
The most affordable, widely available cabinet styles are slab (flat-panel), stock Shaker, thermofoil/laminate, painted MDF, and open shelving. If you need the absolute lowest price per door, slab wins every time — its flat surface requires minimal milling and no decorative routing. Stock Shaker is the best style-per-dollar choice: it suits nearly every aesthetic, stays widely available at home centers, and costs roughly $100–$300 per linear foot installed.
Here’s a quick shortlist to orient your planning:
According to the NKBA’s 2025 Market Study, cabinets account for roughly 30–35% of a typical kitchen renovation budget, which means your door style choice has more leverage on the final number than almost any other single decision. For a 10–12 ft kitchen, installed totals typically run $4,000 on the low end to $15,000+ on the high end, with a common mid-point near $7,500. From a resale standpoint, stock Shaker and slab styles both photograph well and appeal broadly to buyers — neither reads as a “budget” choice when installed cleanly.
Slab and stock Shaker are the two best low-cost kitchen cabinet styles for most budgets, and pairing either with plywood boxes, soft-close hinges, and consistent hardware delivers results that look far more expensive than they are.
| Point | Details |
|---|---|
| Best budget styles | Slab and stock Shaker offer the lowest cost with the broadest aesthetic appeal. |
| Realistic cost range | Installed totals for a 10–12 ft kitchen run roughly $4,000–$15,000+, with $7,500 as a common mid-point. |
| Biggest cost lever | RTA cabinets save 20–40% versus pre-assembled; combine with DIY assembly for maximum savings. |
| Material priority | Choose plywood boxes over particleboard even on a tight budget — they last significantly longer. |
| The Kitchen, Bathroom & Flooring Store | Offers full-service cabinet selection, design help, and professional installation in Jacksonville and surrounding counties, with package financing available. |
Shaker and slab doors are the two most cost-effective starting points for budget renovations, and for good reason: both styles rely on geometry rather than ornamentation to create visual interest, which keeps manufacturing simple and prices low.
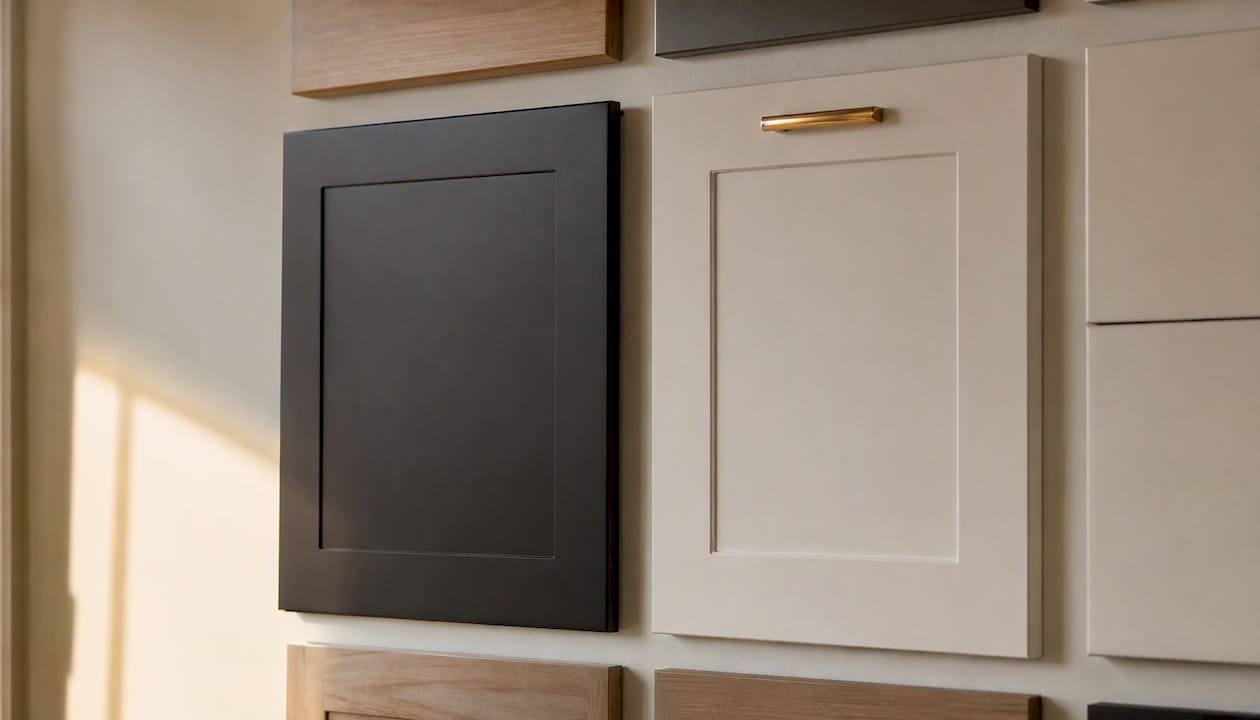
Slab (flat-panel) doors are a single, uninterrupted panel — no rails, no stiles, no routed profile. That simplicity is exactly what makes them cheap to produce. In a white or light gray finish, slab cabinets read as contemporary and intentional. The tradeoff is that any surface imperfection (a ding, a warp) is immediately visible because there’s nowhere for it to hide. Pair slab doors with matte or satin hardware in black or brushed brass for a look that punches well above its price.
Stock Shaker is the most widely used door style in American kitchens, and its popularity is a direct result of availability. Because it’s stocked in volume at home centers and cabinet warehouses, the price stays competitive. The five-piece recessed-panel construction suits farmhouse, transitional, and even mid-century modern kitchens depending on finish. White and off-white are the safest colors for resale; navy and sage are strong choices if you want personality without risk.
Thermofoil and laminate doors wrap a substrate (usually MDF) in a heat-bonded vinyl or laminate film. The result is a seamless, easy-to-wipe surface that resists grease and moisture better than raw painted wood. The visual tradeoff is that thermofoil can peel at the edges over time, especially near heat sources like dishwashers. Keep thermofoil away from the dishwasher cabinet and any cabinet directly above a range, and it will hold up well for years.
Painted MDF gives you the crisp, furniture-like look of a painted wood door at a lower material cost. MDF takes paint exceptionally well — better than most solid woods — so the finish quality can look genuinely high-end. It is, however, sensitive to moisture at the edges, so it’s a better fit for dry climates or kitchens with good ventilation.
Open shelving removes the door cost entirely. The practical downside is dust accumulation and the need to keep displayed items organized.
Veneer and slatted fronts are worth a brief mention. Veneer-wrapped doors offer a real-wood look at lower cost than solid wood, though quality varies widely by manufacturer. Slatted or fluted fronts have grown in popularity as a textured, design-forward option that still uses simple construction.
Pro Tip: Choose a door style that photographs well in natural light. Slab and Shaker both do — their clean lines create strong shadow lines that read as intentional and high-quality in listing photos, which matters if resale is on your horizon.
The supply tier you choose affects price more than almost any other single variable. Here’s how the three tiers break down in practical buyer terms:
Stock cabinets are manufactured in fixed sizes (typically in 3-inch increments) and held in inventory at home centers or warehouses. You pick from what’s on the shelf. The upside is price and speed — stock is the least expensive tier and often available immediately. The downside is that standard sizes rarely match your kitchen’s exact dimensions perfectly, which means you’ll fill gaps with filler strips. Stock runs roughly $100–$300 per linear foot installed, making it the go-to for tight budgets.
Semi-custom cabinets are built to order in a wider range of sizes and configurations, typically in 1/2-inch or 1-inch increments. You get better fit, more finish options, and fewer filler strips — at a price of roughly $200–$650 per linear foot installed. Semi-custom lines often hit a sweet spot of value for homeowners who want improved fit and finish without paying full custom prices. For kitchens with unusual dimensions or corner configurations, semi-custom can actually save money by eliminating the labor and material cost of excessive filler.
Custom cabinets are built from scratch to your exact specifications. They offer the most flexibility in size, material, and finish — and the highest price, typically $500–$1,200 per linear foot installed. For a budget project, custom is rarely the right call unless you have a genuinely unusual layout that stock and semi-custom can’t address.
| Tier | Installed cost (per linear foot) | Flexibility | Lead time | Best for |
|---|---|---|---|---|
| Stock | $100–$300 | Low (fixed sizes) | Days to weeks | Tight budgets, standard layouts |
| Semi-custom | $200–$650 | Medium (incremental sizing) | Several weeks | Better fit, modest budget premium |
| Custom | $500–$1,200 | High (any dimension) | Months | Unusual layouts, high-end finishes |
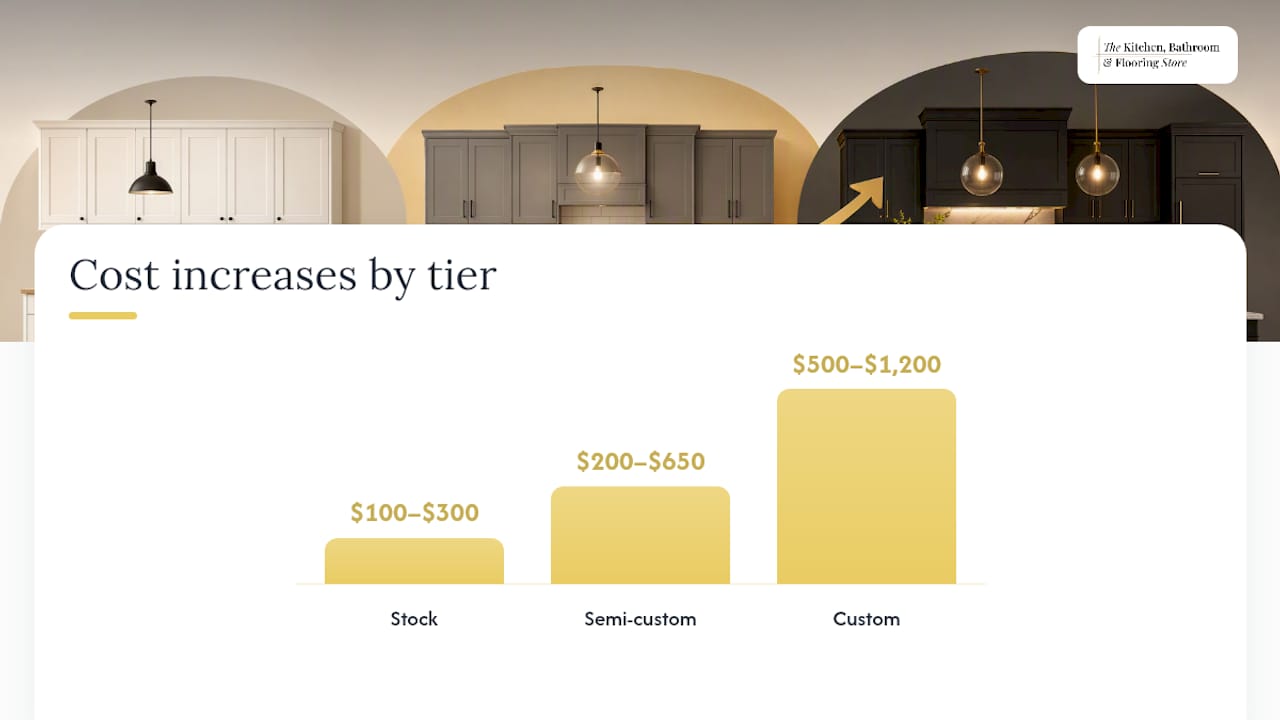
For most budget projects, stock is the right starting point. If your kitchen has one or two problem areas — a corner unit, an odd wall dimension — consider semi-custom only for those specific cabinets and stock everywhere else. That hybrid approach keeps costs down while solving the fit issues that would otherwise require excessive filler.
Material choice is where many budget renovations go wrong. Spending less on the door style is smart; spending less on the box construction often costs more in the long run.
Particleboard is the most common substrate in entry-level cabinets. It’s inexpensive and stable when dry, but it swells and crumbles when exposed to moisture. In a kitchen — where steam, spills, and dishwasher humidity are facts of life — particleboard boxes under sinks and next to dishwashers are a liability. If your budget forces particleboard boxes, seal all cut edges and use a drip tray under the sink.
MDF (medium-density fiberboard) is denser and more uniform than particleboard, which makes it a better substrate for painted doors. It’s still moisture-sensitive at the edges, but it holds screws better and resists warping more reliably than particleboard. For door faces, MDF is an excellent choice. For box construction, plywood is still preferable.
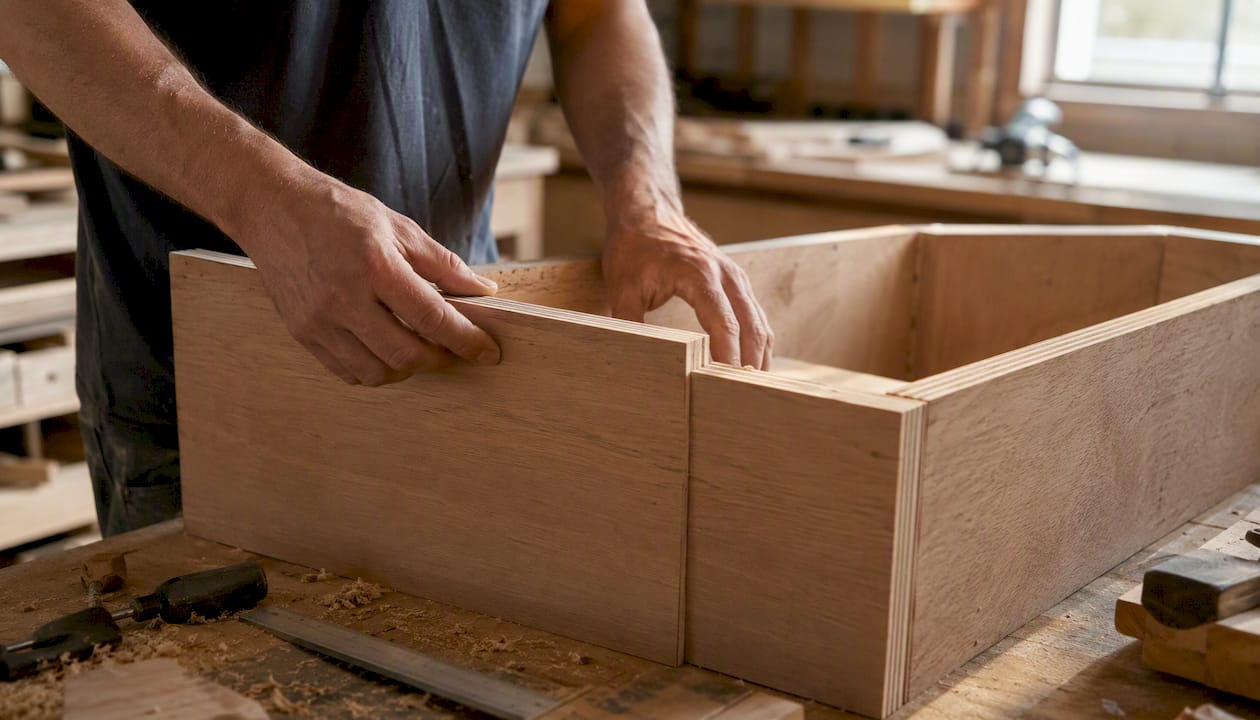
Plywood boxes cost more upfront — typically 15–20% more than particleboard equivalents — but they hold screws far better, resist moisture more reliably, and last significantly longer. Pairing plywood boxes with budget-friendly thermofoil or painted MDF door faces is one of the smartest moves in a low-cost kitchen remodel. You get durability where it counts and savings where it shows least.
Thermofoil is a heat-bonded vinyl film applied over MDF. It’s easy to clean, resists grease, and comes in a wide range of colors and textures including wood-grain looks. The main failure mode is edge peeling near heat sources. Keep thermofoil doors away from the dishwasher and range, and they’ll perform well for a decade or more.
Laminate/melamine is a paper-based surface bonded to particleboard or MDF under heat and pressure. It’s extremely durable on flat surfaces and resists scratches better than paint. The edges are the weak point — exposed laminate edges chip and peel. Look for post-formed or edge-banded laminate cabinets for better longevity.
Two upgrades that genuinely move the needle without breaking the budget: plywood box construction (over particleboard) and soft-close hinges. Soft-close hardware adds roughly $150–$500 to a project depending on scale, but it eliminates the wear and noise of slamming doors and makes even a budget cabinet feel more refined. For a deeper look at how material choices and finishes affect affordability, the tradeoffs between thermofoil, veneer, and painted MDF are worth reviewing before you finalize your selection.
The biggest savings in a cabinet project don’t come from buying the cheapest product — they come from being strategic about what you replace, what you reuse, and how you source materials.
Reface instead of replace. If your cabinet boxes are structurally sound (no water damage, no warping, hinges still align), refacing the doors and drawer fronts costs a fraction of full replacement. You keep the existing boxes, add new door faces and veneer to the exposed frame, and get a near-new look for 40–60% less than a full cabinet swap.
Replace doors and hardware only. This is the most budget-friendly refresh short of painting. New slab or Shaker doors on existing boxes, combined with updated hardware, can completely transform the kitchen’s appearance. Order replacement doors from a cabinet door supplier, measure carefully, and install them yourself over a weekend.
Choose RTA (ready-to-assemble) cabinets. RTA cabinets save roughly 20–40% versus comparable pre-assembled options, and modern RTA lines now offer plywood boxes and solid face frames that close the quality gap with big-box pre-assembled units. Mid-range RTA for a 10×10 kitchen typically runs $1,800–$5,000 in materials. If you’re comfortable with basic assembly, RTA is the single highest-leverage cost-saving move available.
Use a hybrid sourcing strategy. Buy RTA stock cabinets for your base run and standard upper cabinets. Reserve semi-custom or pre-assembled units for specialty pieces — a corner lazy Susan, a tall pantry cabinet, or a sink base with unusual dimensions. This keeps the bulk of your spend in the lowest-cost tier while solving the fit problems that stock can’t handle.
Shop surplus and last-call displays. Cabinet showrooms regularly discount display models and discontinued lines at 30–50% off. These are often semi-custom or mid-grade cabinets at stock prices. The catch is that you’re buying what’s available, not what you designed — so measure your kitchen first and shop with dimensions in hand.
Reuse your existing boxes. If a full reface isn’t feasible, consider keeping the boxes entirely and simply painting them. A quality cabinet paint (Benjamin Moore Advance or Sherwin-Williams Emerald Urethane) applied over properly prepped surfaces can last 5–8 years with normal use. Combined with new hardware, it’s the lowest-cost refresh available.
DIY the assembly, hire a pro for the install. Assembling RTA cabinets yourself saves labor cost on the most time-consuming prep step. But the actual installation — leveling, shimming, securing to studs, scribing to walls — is where mistakes are expensive to fix. Paying a pro for installation while doing your own assembly is a smart hybrid that keeps quality high where it matters.
Pro Tip: Before ordering anything, draw your kitchen to scale on graph paper or use a free tool like IKEA’s kitchen planner. Catching a sizing mistake before the order ships saves far more than any discount.
For a full step-by-step planning framework, our budget kitchen remodel checklist walks you through every decision in order, from measuring to final hardware selection.
Installed totals for a 10–12 ft kitchen replacement typically range from about $4,000 on the low end to $15,000+ on the high end, with a mid-point near $7,500. What you get at each level differs significantly.
A low-end budget ($4,000–$6,000) usually means stock cabinets with thermofoil or painted MDF doors, basic hardware, and either DIY installation or a single-day pro install on a simple layout. Boxes are often particleboard at this price point.
A mid-range budget ($6,000–$10,000) opens up semi-custom sizing, plywood box construction, soft-close hinges, and a wider finish selection. Labor is typically included, and the result is noticeably more durable and refined.
A stretch budget ($10,000–$15,000+) gets you semi-custom or entry-level custom cabinets with full-extension drawer slides, dovetail drawer boxes, and premium hardware throughout. At this level, the cabinet quality approaches what most homeowners think of as “high-end.”
The component breakdown below shows where the money goes and why each line item varies:
Hardware alone can range from $150 to $2,000 depending on the number of cabinets and finish choice — a line item that surprises many homeowners who budget only for boxes and doors. Build it in from the start. For a more detailed kitchen remodel cost breakdown that covers countertops, plumbing, and electrical alongside cabinetry, our guide walks through every category.
Timeline is one of the most underestimated variables in a cabinet project. Getting the schedule wrong can leave you without a functional kitchen for weeks longer than planned.
For faster project timelines, our guide on fast kitchen renovation options covers which cabinet types and sourcing strategies consistently deliver the shortest lead times.
The honest answer is: most homeowners can handle assembly and painting themselves, but installation is where DIY mistakes get expensive.
DIY is a reasonable choice when:
Hire a pro when:
Questions to ask any contractor before signing:
Red flags in low bids:
For guidance on vetting local contractors and comparing quotes, our kitchen remodel near me guide covers what to look for and what to avoid.
Most budget cabinet projects that look cheap share one trait: inconsistency. A slab door on the base cabinets, a different profile on the uppers, mismatched hardware finishes, and open shelving that wasn’t planned from the start. The result is a kitchen that reads as assembled rather than designed.
The most effective low-cost kitchens pick one door style, one hardware finish, and one color palette — and execute all three consistently. A white stock Shaker kitchen with matte black pulls is not an expensive kitchen. But it looks like one, because the decisions are coherent. That coherence is free. It costs nothing except the discipline to resist mixing styles when you find a deal on something that doesn’t quite match.
Slab doors deserve a specific mention here. They’re the cheapest option on the market, but they’re also the most unforgiving. A slab door in a poorly lit kitchen with mismatched hardware looks like a budget choice. The same door in a well-lit kitchen with consistent pulls and a clean backsplash looks intentional and modern. The door didn’t change — the context did. If you’re going slab, invest the savings into lighting and hardware. Your cabinets will thank you.
Sourcing cabinets, coordinating delivery, scheduling an installer, and managing the inevitable surprises is a lot to handle on your own — especially when you’re already watching every dollar. The Kitchen, Bathroom & Flooring Store gives Jacksonville, Saint Johns, and Duval County homeowners a single point of contact for the entire project: design consultation, cabinet selection, and professional installation, all without the need to coordinate separate contractors.

For budget projects specifically, that matters because our design team helps you identify where to spend and where to save before you commit to anything. We carry a range of stock and semi-custom cabinet lines, including affordable slab and Shaker options, and we offer package financing so the project fits your monthly budget rather than requiring a lump-sum outlay. You’re not left comparing quotes from three different vendors and hoping the measurements match.
The next step is simple: schedule a free in-home remodeling estimate and we’ll come to you, measure the space, and walk through realistic options at your price point. No pressure, no guesswork. Just a clear picture of what your kitchen can look like and what it will cost. You can also explore our full remodeling packages to see how we structure projects from start to finish.
The cost figures and style guidance in this article draw from the following sources, selected for their use of real market data, lab testing, or industry survey methodology: