
For most U.S. homes, choose a 5–8 mm SPC or WPC plank paired with a 12–20 mil wear layer. That single combination covers the majority of residential rooms at a price that makes sense. Here are three quick starting points:
The wear layer (mils) determines how long your LVP surface lasts; total thickness (mm) determines how it feels and how well it handles subfloor imperfections — get both numbers right before you buy.
| Point | Details |
|---|---|
| Wear layer is the durability spec | Choose 12 mil for standard residential, 20 mil for active households, 20+ mil for pets or rentals. |
| Total thickness affects feel and stability | The 5–7 mm range is the residential sweet spot for most U.S. homes. |
| Match core type to your subfloor | SPC (4–6 mm) suits concrete and temperature-variable rooms; WPC (6–8 mm) adds cushion on stable subfloors. |
| Subfloor prep is non-negotiable | Test for moisture on concrete, check flatness to 3/16 inch over 10 feet, and fix issues before installation. |
| The Kitchen, Bathroom & Flooring Store | Offers full-service LVP selection, subfloor prep, and installation in Jacksonville and surrounding counties. |
Every LVP product ships with two measurements, and mixing them up is the single most common buyer mistake we see.
Wear layer (measured in mils) is the clear, protective top coat bonded to the decorative layer. One mil equals one-thousandth of an inch, so 12 mil = 0.012 inches and 20 mil = 0.020 inches. This layer takes all the foot traffic, pet claws, chair legs, and dropped pots. A thicker wear layer means longer surface life, period.
Total plank thickness (measured in mm) is the full stack: wear layer + decorative film + core + attached underlayment pad (if included). This number determines how the floor feels underfoot, how much it muffles sound, and how well it spans minor dips or ridges in the subfloor. A 6 mm plank feels noticeably more solid than a 3 mm one, and it can bridge small subfloor imperfections that a thinner plank would telegraph through.
Statistic callout: Residential LVP products range from 2 mm to 8 mm in total thickness, with 5–7 mm being the sweet spot for most home installs.
Here is what to look for on the product label or spec sheet:
Matching the right plank to the right room comes down to traffic, moisture exposure, and subfloor conditions. Here is how the ranges break down in practice.
| Total Thickness | Core Type | Typical Use Case |
|---|---|---|
| 2–3 mm | Basic vinyl | Temporary, low-budget, low-traffic only |
| 4–5 mm | SPC or basic | Builder-grade, rental units, bedrooms |
| 5–6 mm | SPC | Standard residential: kitchens, living rooms |
| 6–7 mm | SPC or WPC | Active households, basements, open-plan areas |
| 8+ mm | WPC | Maximum comfort, bonus rooms, over radiant heat |
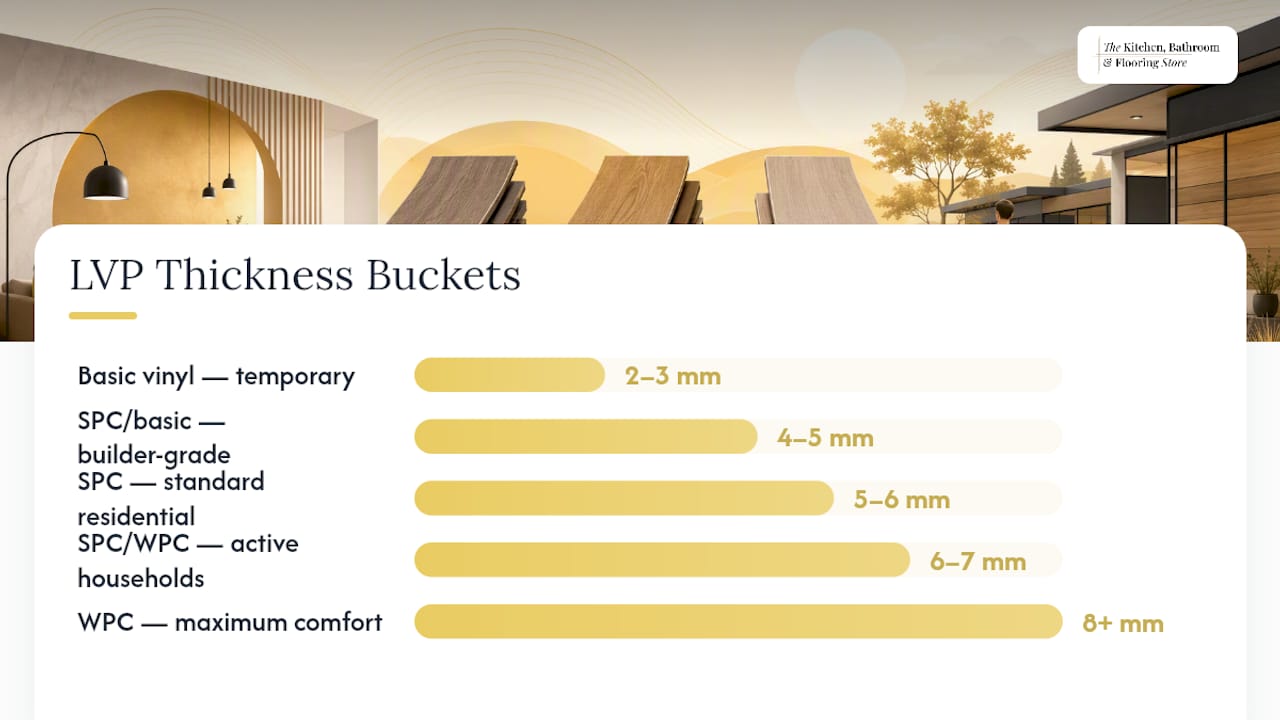
According to FloorNerd’s LVP buying guide, SPC cores run 4–6 mm and offer higher rigidity and temperature stability, while WPC cores run 6–8 mm and deliver more cushion underfoot with slightly less dimensional stability.
The floor you pick in the showroom has to work with the subfloor you already have. Getting that match wrong is what leads to squeaks, gaps, and warranty voids.
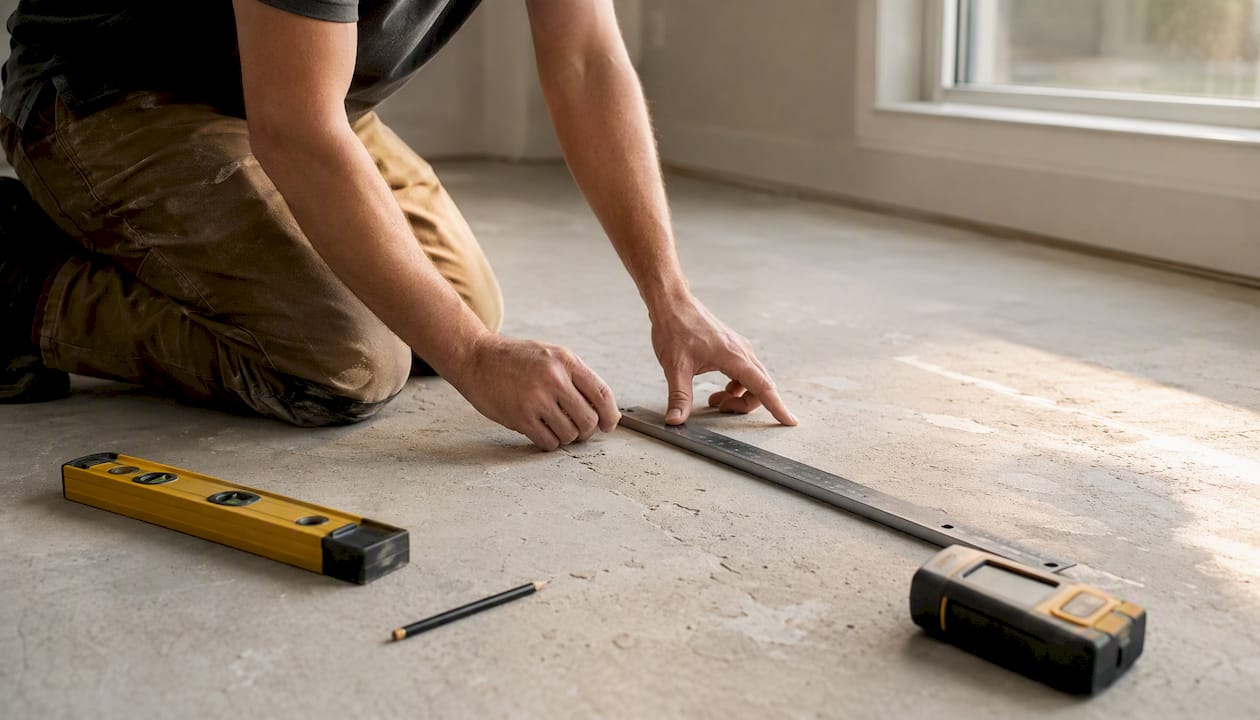
Floating / click-lock systems are the most DIY-friendly and work well with 5–7 mm rigid-core SPC products. The planks lock together and “float” over the subfloor without adhesive. The trade-off: the subfloor must be flat to within 3/16 inch over a 10-foot span. Any high spots or dips beyond that will cause planks to flex, click joints to stress, and edges to lift over time.
Glue-down installs suit thicker planks and commercial-grade products. They handle heavy point loads better and eliminate the hollow-sounding “tap” some floating floors produce. Unified Wholesale’s installation guide notes that glue-down is often chosen for thicker constructions where maximum stability is the priority.
Peel-and-stick is limited to very thin planks (2–3 mm) and is generally not recommended for high-traffic or moisture-prone areas.
Subfloor surface matters:
Moisture in basements and garages: Always test before you buy. A calcium chloride test or in-situ relative humidity (RH) probe gives you a concrete number. Most LVP manufacturers specify a maximum RH threshold in their warranty. If you skip this step and moisture causes the floor to buckle, the warranty will not cover it.
Pre-installation checklist:
Pro Tip: If your product has a pre-attached underlayment pad, do not add a second layer underneath. Stacking pads creates too much give in the floor, which stresses click joints and can void the manufacturer’s warranty.
Wear layer thickness is the single most reliable predictor of how long an LVP floor will last under real-world conditions. FloorFreight’s wear-layer breakdown maps the tiers this way:
Total plank thickness affects dent resistance and underfoot feel, but it does not protect the surface from scratches or scuffs. A thick plank with a thin wear layer will still show wear quickly in a busy kitchen. A thinner plank with a 20 mil wear layer will outlast it on the surface by years.
Cost vs. lifespan trade-offs:
On warranties: A longer warranty is a useful signal, but read the fine print. Check whether the warranty is classified as residential or commercial, what it covers (surface wear vs. structural defects), and what it excludes (pet damage, improper installation, moisture). A 30-year residential warranty on a 12 mil product is not the same protection as a 15-year warranty on a 20 mil product in a busy home.
Use this before you commit to any product.
Questions to ask your supplier:
Red flags to watch for:
Knowing what not to do is just as useful as knowing what to buy.
Pro Tip: The single most common installation failure we see is a wear layer that was too thin for the actual traffic in the room. Before you finalize your purchase, walk through your home and honestly rate each room’s traffic level — then buy one mil tier higher than you think you need for kitchens, entries, and any room with pets.
Some LVP projects are genuinely DIY-friendly. A straightforward bedroom or living room with a flat plywood subfloor and a click-lock product is a reasonable weekend project for a careful homeowner. Other situations call for professional help.
Hire a professional installer when:
Checking a local installer’s BBB profile is a quick way to verify reputation before signing a contract.
At The Kitchen, Bathroom & Flooring Store, we handle every part of the process — from helping you choose the right LVP product for your Jacksonville home to subfloor prep, installation, and finishing transitions. You do not need to coordinate separate contractors. Our team brings design consultation, product selection, and professional installation under one roof, with financing options to fit your budget.
We work with homeowners across Jacksonville, Saint Johns County, and Duval County. Whether you need a single room done right or a whole-home flooring installation, our team walks you through every spec decision so you are never guessing at the store.
The wear-layer conversation is one we have every week with homeowners who come in holding a spec sheet and asking why two planks that look identical cost very different amounts. Almost always, the answer is in the mils.
We have pulled up floors installed with 6 mil wear layers in kitchens that were only three years old, already showing visible scuffing at the traffic paths. The same room, re-done with a 20 mil product, looks fresh years later. The total thickness was nearly identical in both cases. That gap in performance comes entirely from the wear layer.
The other thing DIYers consistently underestimate is subfloor prep. A click-lock floor installed over a subfloor with a 1/4-inch dip will develop a soft spot within months. Leveling that dip before installation takes an hour. Fixing a buckled floor after the fact takes a weekend and a full product replacement. Expansion gaps matter too: LVP needs room to move with temperature changes, and a floor butted tight against a wall will eventually push up at the seams. Leave the gap the manufacturer specifies, cover it with baseboard, and the floor will stay flat for years.
Choosing the right LVP spec is only half the job. Getting it installed correctly on a properly prepared subfloor is what makes the floor last.

The Kitchen, Bathroom & Flooring Store offers free in-home measurements and estimates for homeowners in Jacksonville, Saint Johns County, and Duval County. Bring your room dimensions to our showroom and walk out with real samples, a confirmed spec recommendation, and a clear installation quote. No guesswork, no separate contractors, no surprises. We carry a full range of LVP flooring options across every thickness and wear-layer tier, and our installation team handles subfloor prep, transitions, and finishing details as part of the package. Financing options are available to fit your project budget.
Visit our Jacksonville flooring showroom or call to schedule your free estimate today.
These are the sources referenced throughout this guide, organized by the follow-up question they answer best.