
The fastest way to save money flooring installation costs is to combine three moves: time your material purchase to a sale window, handle the nontechnical prep work yourself, and collect three apples-to-apples bids before you sign anything. Do all three and you can realistically shave hundreds, sometimes over a thousand dollars, off a typical project. Most homeowners land somewhere between $1,528 and $4,859 for a full installation, with the average project settling around $3,159.
Here’s where the real savings live:
Saving money on flooring installation comes down to controlling three variables: purchase timing, labor scope, and bid transparency.
| Point | Details |
|---|---|
| Timing drives savings | Buy during clearance windows and book installers during slower seasons for better pricing on both fronts. |
| Labor is most of the bill | Labor commonly makes up 60% of total project cost, so negotiating it separately from materials matters more than haggling over flooring price. |
| Subfloor checks prevent overruns | Inspecting the subfloor before signing avoids the $1 to $4 per square foot in added cost that hidden damage typically causes. |
| DIY fits simple rooms | Click-lock LVP or laminate in a straightforward rectangular room is a reasonable DIY project; tile, hardwood, and damaged subfloors are not. |
| Turnkey removes the risk | The Kitchen, Bathroom & Flooring Store offers design, material selection, and installation together for homeowners who want one accountable provider. |
Most homeowners assume materials drive the bill. They don’t. Labor typically accounts for roughly 60% of a flooring project’s total cost, with materials making up the remaining 40%. That split matters because it tells you where negotiation actually pays off, and it’s rarely the flooring itself.
Per square foot, materials commonly run $1.50 to $12 depending on grade, while labor for most installs falls between $3 and $8 per square foot. Underlayment, moisture barriers, and prep work show up as separate line items, and that’s exactly where quotes start to diverge.
Statistic Callout: A 500 square foot living room using mid-grade LVP might run $2,500 to $6,000 installed. A 1,200 square foot whole-floor project in solid hardwood can climb past $12,000. The difference isn’t just square footage. It is the labor intensity of the material itself.
Rough project examples:
Ask every bidder to separate the labor line from the material line. If a contractor won’t itemize, that’s a sign the quote is padded somewhere you can’t see.
Inspect the subfloor and every transition point before you finalize a bid. This single step catches most of the budget surprises that blow past a homeowner’s plan.
Ignoring subfloor condition until installation day can add $1 to $4 per square foot to your total, and that’s on top of whatever price you already agreed to. A structurally sound, flat, dry subfloor lets new flooring go down directly; hidden rot or moisture usually means remediation you didn’t budget for.
Commonly missed cost items:
Pro Tip: Schedule a subfloor inspection before you finalize any bid, not after. A contractor who checks moisture levels and flatness up front, instead of promising to “handle it if it comes up,” is telling you the price you see is closer to the price you’ll pay.
The lowest per-square-foot price tag doesn’t guarantee the lowest cost over time. A $2 sheet vinyl might need replacing in eight years while a $5 LVP lasts three times as long, and in Florida’s humidity, that gap widens fast.
| Material | Installed cost per sq ft | Typical lifespan | Notes |
|---|---|---|---|
| Basic sheet vinyl | $1.50–$3 | 5 years | Cheapest upfront, softens in high heat |
| Laminate | $3–$8 | 15 years | Not moisture-tolerant, avoid in wet rooms |
| Luxury vinyl plank (LVP) | $3–$7 | 15 years | Strong value pick for humidity and DIY installs |
| Tile | $5–$12 | over 20 years | Best for wet rooms, higher labor cost |
| Engineered hardwood | $6 to $8 | 20 years | More stable than solid wood in humidity |
| Solid hardwood | $8–$15 | 30 years | Vulnerable to Florida humidity swings without proper acclimation |
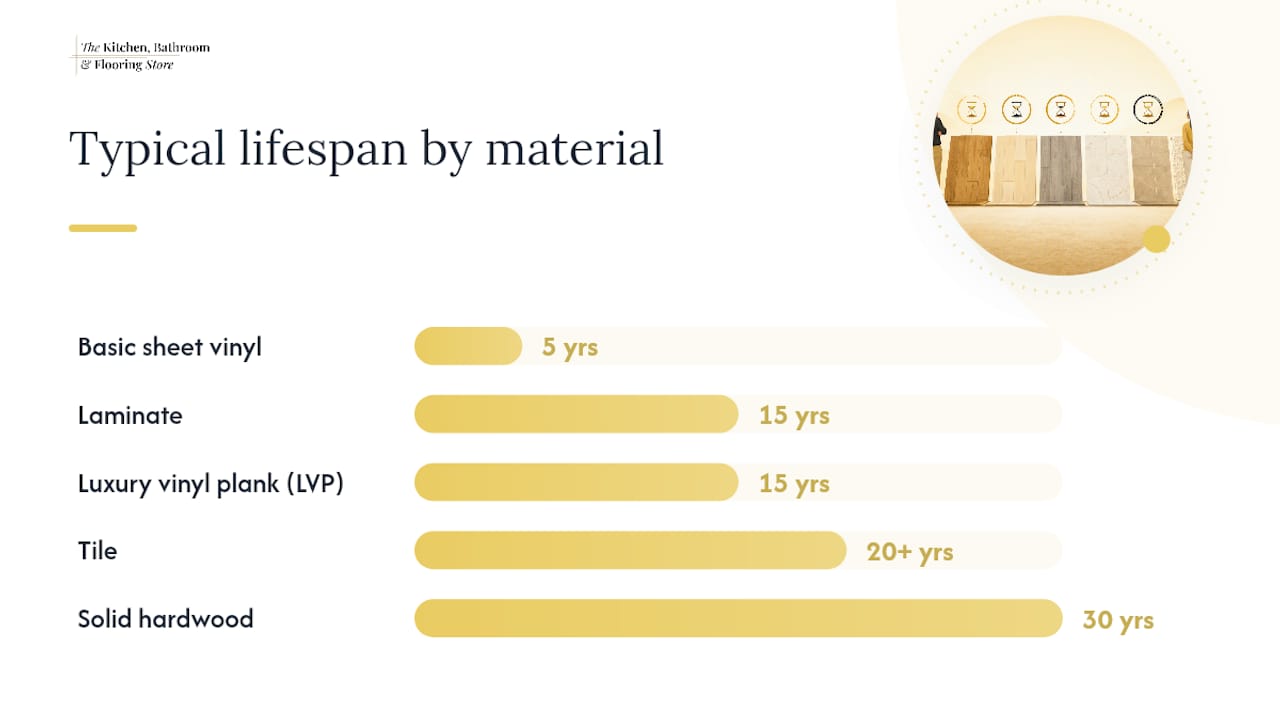
Florida’s heat and humidity punish materials that expand and contract. That’s why mid-grade LVP tends to outperform basic vinyl or laminate in sunrooms, lanais, and ground-floor rooms near AC vents.
Spend where it counts: a thicker wear layer and quality underlayment. Economize on trim finishes or transition hardware where the difference is cosmetic, not structural.
DIY makes sense for click-lock LVP or laminate in a simple, rectangular room. Hire a pro for tile, hardwood, curved layouts, or any room where the subfloor already shows damage.
Tasks you can safely handle yourself:
Tasks worth hiring out:
Statistic Callout: On a 500 sq ft room, doing your own demo and room-clearing can save several hundred dollars in labor, since contractors often mark up consumables and charge separately for hauling. But a botched DIY tile job that needs a pro to fix often costs more than hiring it out from day one.
Ask yourself: Is the room a simple rectangle? Is the subfloor confirmed dry and flat? Is the material forgiving of small installation errors? Three yeses means DIY is a reasonable bet.
Compare three bids built on the exact same scope, then negotiate the full project price, not just the hourly labor rate. A vague scope is how contractors pad numbers without you noticing.
Once you have three comparable bids, negotiate materials and labor as separate conversations. If you can buy a specific SKU cheaper elsewhere, tell the contractor. If you’re flexible on scheduling, ask if an off-week slot comes with a discount.
Pro Tip: Showing an installer the retail price of the exact product SKU you want, printed or on your phone, tends to shrink material markups faster than any verbal negotiation. Contractors know you’re price-checking, and most would rather match it than lose the job.
For more on vetting installers in your area, this local hiring guide walks through red flags worth watching for.
Follow this sequence from planning to move-in day and you’ll catch most of the costs that sneak up on homeowners.
Before signing: confirm the quote lists labor and materials separately, states the waste percentage, and names who handles disposal.
During installation: watch for subfloor issues the crew flags mid-job. Get any change order in writing before work continues.
After installation: walk the space before final payment and check transitions, baseboards, and any spots near exterior walls for gaps.
Build your budget as materials plus labor plus extras plus a contingency of roughly 15%. That contingency isn’t padding. It’s what protects you from the subfloor surprise that adds $1 to $4 per square foot after the job has already started.
The 50% rule is a useful decision tool: if repairing damaged flooring would cost more than half of full replacement, replace it instead of patching around the problem.
Statistic Callout: A 500 sq ft LVP project quoted at $4,000 with a 15% contingency means budgeting $4,600 total. If the crew finds subfloor rot mid-install, that reserve covers it without derailing the rest of the renovation.
Not every room needs the same flooring, and matching material to traffic pattern is one of the easiest ways to avoid overspending. A guest bedroom that sees light foot traffic doesn’t need the same wear layer as a kitchen or a mudroom.
For high-traffic zones like entryways, kitchens, and hallways, LVP or tile hold up far better than laminate, which can show wear and moisture damage within a few years in these spots. Laminate works fine in bedrooms and formal living rooms where foot traffic is lighter and spills are rare.
Bathrooms and laundry rooms need moisture resistance above almost everything else. Tile remains the safest long-term bet here, though budgeting realistically for tile’s cost drivers upfront prevents surprise line items once the job is underway.
Kids’ rooms and playrooms benefit from softer, more forgiving materials. LVP with a thicker wear layer resists scuffs and dropped toys better than basic laminate, and it’s worth the modest upcharge in rooms that see daily impact. Homes with pets often see the same durability logic play out as homes with young kids.
Florida sunrooms and rooms with heavy south-facing windows need a material rated for UV exposure, since sun exposure can fade or warp the wrong flooring choice faster than most homeowners expect. Spending a little more per square foot in these specific rooms, while economizing elsewhere, is a smarter allocation than uniform flooring throughout the house.
Whether to tear out the old floor or install over it changes your budget in ways that aren’t always obvious at the quote stage.
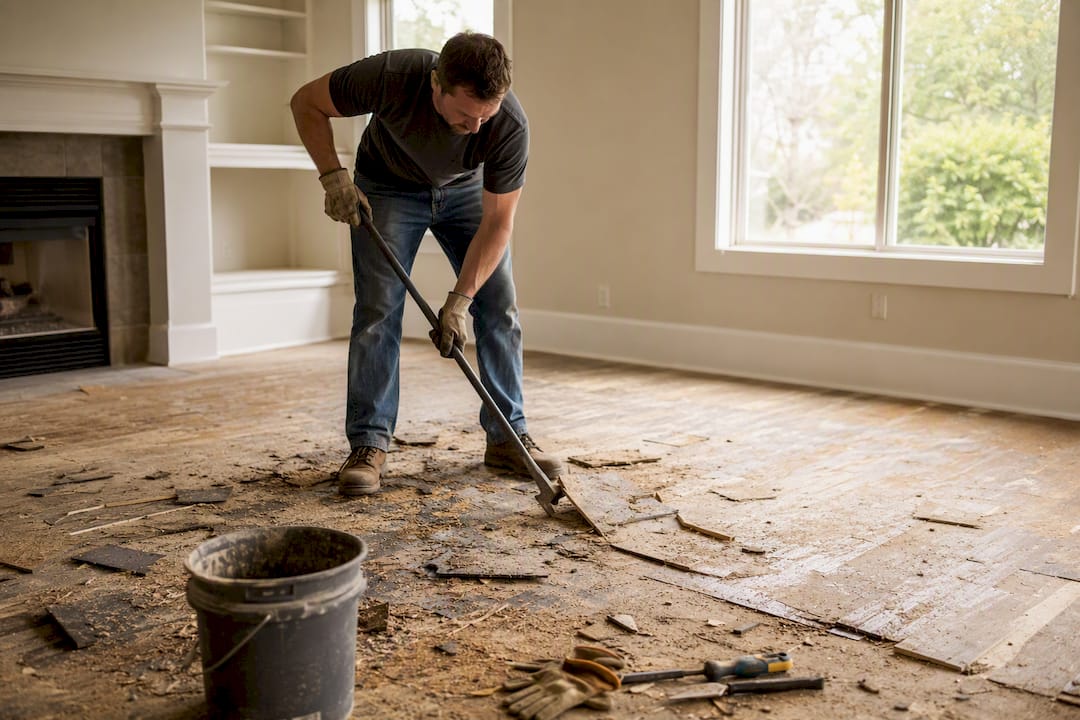
Installing over existing flooring, when the material and subfloor allow it, skips demo labor and disposal fees entirely. Some LVP and laminate products can go directly over old vinyl or tile if the surface is flat and structurally sound, which trims both time and cost from the project. This only works when the existing floor isn’t damaged, uneven, or holding moisture underneath.
Removal becomes necessary, and worth the added cost, when the old flooring is failing, when moisture is trapped beneath it, or when the new material requires a fully exposed subfloor to perform correctly. Hardwood and tile installations usually demand full removal, since floating a new rigid material over an unstable old one risks cracking or shifting later.
The catch is that removal costs vary widely depending on what’s underneath. Pulling up glued-down vinyl or old ceramic tile takes considerably more labor than lifting a floating laminate floor, and disposal fees stack on top of that labor. Homeowners who do their own demo, as covered earlier, can absorb a meaningful chunk of this cost themselves.
Before committing either way, ask your contractor to physically check what’s under the current floor. A quote that assumes “install over” without confirming subfloor condition is one of the more common places a budget project turns into a change order.
Tool costs add up fast on a DIY flooring project, and the rent-or-buy decision depends entirely on whether you’ll use the tool again.
A flooring nailer, wet saw for tile, or heavy-duty floor roller can each cost $150 to $400 or more to buy outright. Renting the same equipment for a weekend typically runs a fraction of that price, and most home improvement stores offer daily or weekend rental rates specifically for one-time projects.
Buy tools you’ll use repeatedly: a basic tapping block, pull bar, and utility knife for LVP or laminate installs are inexpensive enough that owning them makes sense even for a single project, and you’ll likely use them again for smaller repairs down the road.
Rent tools with a narrow, specific use: wet tile saws, floor sanders, and specialty nailers rarely justify ownership unless you’re tackling multiple rooms or plan to take on future flooring projects. The challenges homeowners run into with specialized DIY tools apply just as much to flooring as they do to other home projects. Unfamiliar equipment plus a steep learning curve often means wasted material before you get the technique right.
Factor tool costs into your DIY savings estimate honestly. A $300 tool rental on a project where you save $600 in labor is still a win, but it’s a smaller win than the sticker price of “doing it yourself” implies.
The calendar affects your flooring budget almost as much as the material you choose. Inventory clearance windows, often in January and February, bring some of the deepest discounts on flooring materials, since retailers are moving out old stock ahead of new product lines.
Installers have slow seasons too, and pricing often reflects it. Late fall and early winter, outside of the holiday rush, tend to be lighter booking periods for many flooring crews. A contractor with open calendar slots is more likely to negotiate on labor than one booked solid for peak spring and summer renovation season.
Watch for manufacturer rebates and retailer promotions tied to specific product lines, particularly around major holiday sales weekends. These promotions can shift the material-cost side of your budget significantly without touching quality.
If your project timeline has any flexibility, that flexibility itself is a bargaining chip. Tell your installer you can schedule around their open slots in exchange for a better rate. Many crews would rather fill a slow week at a discount than leave it empty.
The single biggest cause of budget overruns isn’t the flooring. It’s what’s underneath it. Subfloor surprises and scope creep account for most of the “wait, why did this cost more” conversations homeowners have mid-project.
The fix is almost embarrassingly simple: insist on a subfloor inspection before any bid becomes final, not after demo starts. Contractors who build that step into the estimate process are protecting your budget, not slowing down your timeline. Local crews who’ve worked Florida’s humidity and slab conditions for years, including teams handling turnkey installs in Nocatee, know exactly which rooms tend to hide moisture problems before anyone else on the job even asks.
If DIY complexity isn’t your idea of a good weekend, hiring a full-service provider removes the risk of mismatched trades and surprise change orders. The Kitchen, Bathroom & Flooring Store manages design, product selection, and installation under one roof, so you’re not coordinating a demo crew, a flooring installer, and a trim carpenter separately.

What’s included when you work with us:
We’ve handled flooring and bathroom remodels throughout Jacksonville, Saint Johns, and Duval County, and our local project history and client feedback are available for anyone weighing a turnkey approach against DIY. If a full renovation is on your radar, our bathroom remodeling packages bundle flooring with the rest of the room. If flooring alone is the goal, browse our flooring options and request a free in-store consultation to get a firm, itemized quote before you decide which route fits your project.