
For a small kitchen, the four layouts that consistently deliver the best results are the galley, L-shaped, one-wall, and compact U or peninsula. The quick decision rule: if your kitchen is a narrow corridor under 8 feet wide, go galley; if you have a corner with an open adjacent room, L-shaped is your best move; if you’re working with a single wall in a studio or open-concept space, one-wall is the answer; and if you have a roughly square footprint with at least 8 feet in both directions, a compact U or peninsula gives you the most storage and counter run.
Before you commit to any layout, pull out a tape measure and note these thresholds:
Pro Tip: Measure your room before you look at a single cabinet catalog. Knowing your exact wall lengths, door swings, and ceiling height takes the guesswork out of every layout decision that follows.
Choosing among the best kitchen layout styles for small spaces comes down to three things: your room’s shape, how many people cook at once, and whether the kitchen opens to a living or dining area. Here’s how each layout stacks up.
| Layout | Best Room Shape | Minimum Footprint | Ideal For | Key Trade-Off |
|---|---|---|---|---|
| Galley | Long, narrow | 7 ft wide × 10 ft long | 1–2 cooks, high efficiency | No natural social zone |
| L-shaped | Corner room | 10 × 10 ft | Open-concept homes | Corner cabinet access |
| One-wall | Open studio/loft | 7 ft wide, 8 ft wall run | Single cooks, renters | Limited counter space |
| Compact U-shaped | Square room | 8 × 8 ft between walls | Storage-focused cooks | Can feel enclosed |
| Peninsula | Corner or square | 10 × 10 ft + peninsula depth | Families, social cooking | Reduces floor space |
Galley layout. Two parallel runs of cabinets and counters face each other across a central aisle. It’s the most efficient layout for cooking because everything is within arm’s reach. According to KitchenAid’s layout guidance, galley and L-shaped configurations are the top recommendations for small footprints because they maximize wall space and keep the work triangle tight. The main drawback is social isolation: with your back to the room, conversation during cooking is harder.
L-shaped layout. Cabinets and counters run along two adjacent walls, forming an “L.” This opens the center of the room for a small table or a movable island. It handles corner space well with lazy Susan or pull-out corner units, and it suits open-concept homes because one leg faces the living area. The corner junction is the weak point: poorly designed corner cabinets waste space.
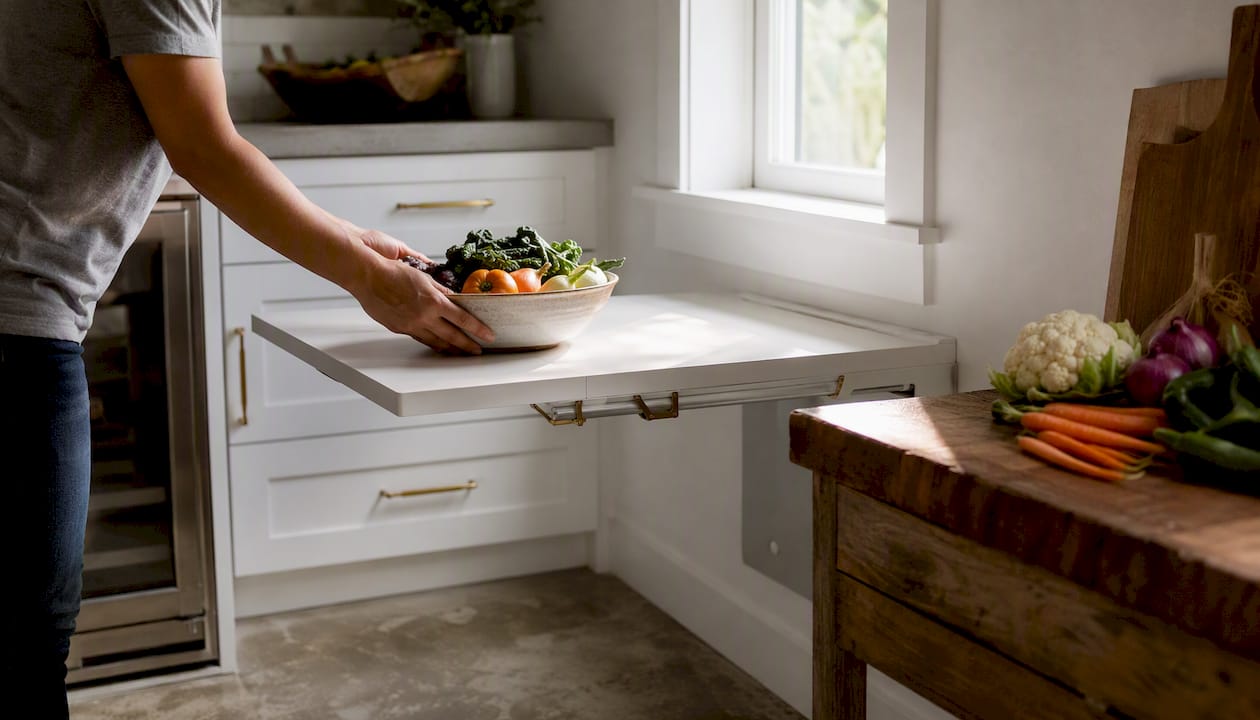
One-wall layout. Everything lines up on a single wall. This is the go-to for studios, loft apartments, and any room where the kitchen shares space with living or dining. It keeps the floor plan open but limits counter run. A fold-down counter or a rolling prep cart can extend workspace when needed.
Compact U-shaped layout. Three walls of cabinetry wrap around the cook. Storage capacity is the highest of any small-kitchen layout, and the work triangle is naturally compact. The catch is that the room needs sufficient distance between parallel walls or the aisle becomes uncomfortably narrow. Micro-galley and micro-U floor plans commonly reference a center aisle wide enough to support two cooks as the practical minimum for two-person operation.
Peninsula layout. A peninsula extends from one wall or cabinet run to create an island-like surface without needing clearance on all four sides. It adds prep space, seating, and a visual divider between kitchen and living areas. Peninsulas offer island benefits without requiring 360-degree clearance; a freestanding island, by contrast, needs 36–42 inches of circulation on every side to function comfortably. If your room can’t accommodate that, a peninsula is almost always the smarter call.
The layout sets the bones, but these tactics are what make a small kitchen genuinely functional day to day. Most can be layered onto any of the five layouts above.
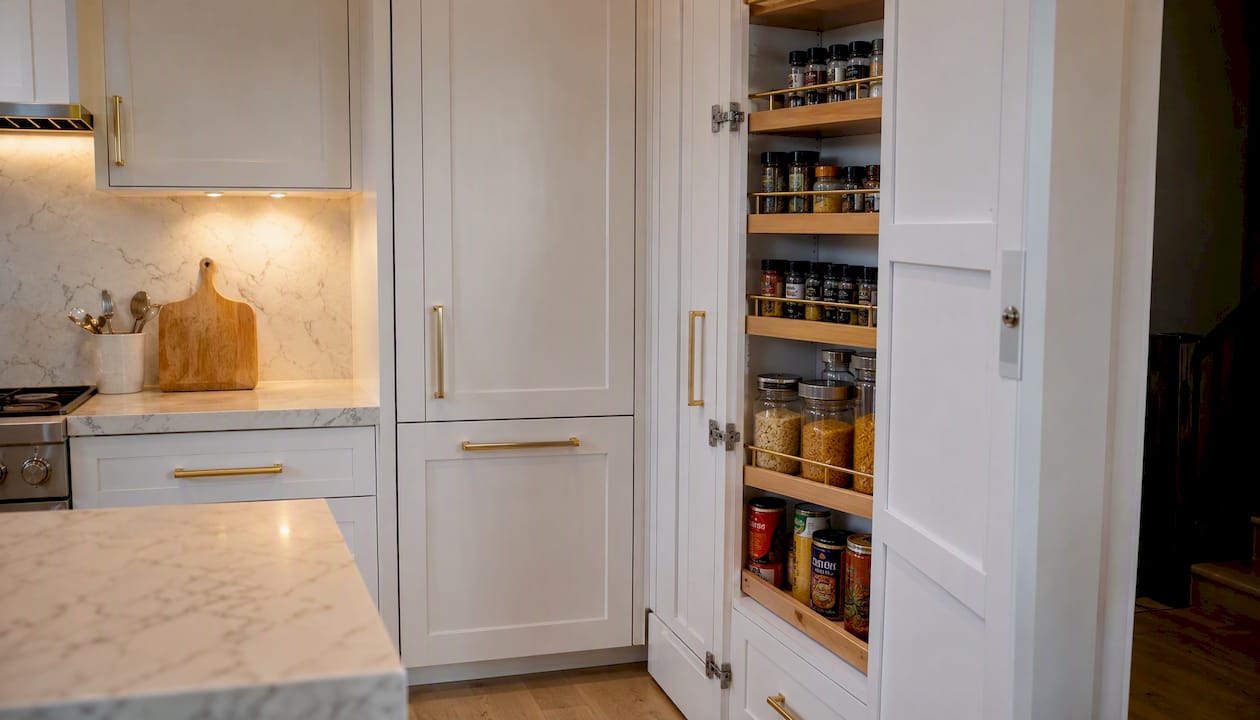
Vertical storage is the single most underused resource in small kitchens. Ceiling-height cabinets add storage without touching the floor plan. Slim pull-out pantry units (as narrow as 6 inches) fit beside a refrigerator or range and hold spices, oils, and canned goods. Toe-kick drawers below base cabinets recover space that’s otherwise dead. For sustainable storage ideas that also reduce clutter, consider open shelving on one wall combined with closed cabinetry on the other — it keeps the room from feeling like a storage unit while still giving you plenty of room.
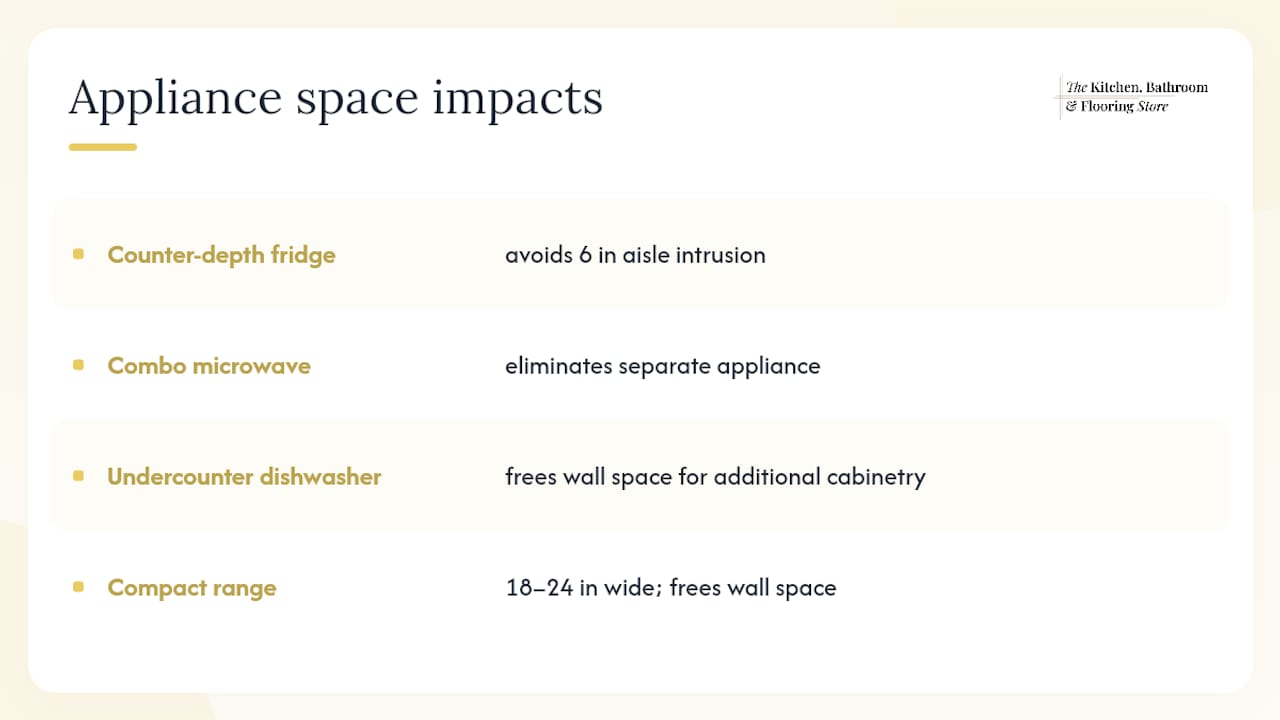
Right-sizing appliances matters more than most homeowners expect. Counter-depth refrigerators sit flush with cabinetry instead of jutting 6 inches into the aisle. Combination microwave/convection oven units eliminate a separate appliance. Undercounter dishwashers and compact 18–24-inch ranges free up wall space for additional cabinetry. Choosing integrated or undercounter appliances preserves counter space and prevents the visual clutter that makes small kitchens feel chaotic.
Flexible surfaces give you prep space when you need it and floor space when you don’t. A pull-out cutting board built into a base cabinet adds 12–18 inches of prep surface without permanently reducing the aisle. Fold-down wall-mounted counters work well in one-wall and galley kitchens. A rolling butcher-block cart can double as a prep station and a serving surface, then roll out of the way entirely.
Lighting and finishes do more for perceived space than most structural changes. Light colors, reflective surfaces, and continuous materials bounce light around the room and create a seamless visual plane that reads as larger. Glossy or semi-gloss cabinet finishes, a mirrored or glass tile backsplash, and a single flooring material that runs from the kitchen into the adjacent room all contribute. Under-cabinet LED strips illuminate the counter directly and eliminate the shadowy corners that make a kitchen feel smaller than it is. For color and finish ideas that translate directly to small kitchens, our color in kitchen renovation guide covers the specific palettes and material combinations that work best.
Pro Tip: The single highest-ROI change in most small kitchens is reclaiming counter space by relocating small appliances into a dedicated appliance garage or a pull-out cabinet. Moving the toaster, coffee maker, and blender off the counter can add 3–4 linear feet of usable prep surface without touching a single cabinet.
Most small-kitchen problems aren’t caused by the room’s size. They’re caused by planning decisions that could have gone differently.
Forcing a full-size island into a room that can’t support it is the most common mistake. An island requires sufficient clearance on all working sides. In a 10 × 10-foot kitchen, that math rarely works. The result is an island that blocks traffic, reduces aisle width below safe minimums, and ends up as a surface for mail and grocery bags rather than a prep station. A peninsula or a rolling cart almost always serves the same purpose with far less impact on circulation.
Ignoring door and drawer swing conflicts during planning creates daily frustrations. A refrigerator door that swings into the path of an open dishwasher, or a base cabinet drawer that can’t fully open because it hits the island, are problems that show up only after installation. Walk through every door and drawer swing on your floor plan before finalizing cabinet placement.
Overloading counters with appliances is a storage problem disguised as a layout problem. If your counters are covered with a toaster, coffee maker, stand mixer, and blender, no layout will feel functional. Appliance garages, pull-out shelves, and dedicated cabinet zones for small appliances solve this without a full remodel.
Mismatched materials that break sightlines make a small kitchen feel fragmented. Three different cabinet finishes, a backsplash that clashes with the countertop, and flooring that stops at the kitchen threshold all chop the room into smaller visual pieces. Keeping materials consistent — or at least complementary — across the kitchen and into the adjacent room makes the space read as larger.
Pro Tip: Before hiring anyone, photograph every wall of your kitchen and mark door swings and appliance clearances on a simple sketch. Bring that sketch to your first contractor meeting. It takes 20 minutes and prevents the most common planning conflicts.
Arriving at a design consultation with accurate measurements cuts planning time in half and prevents costly mid-project corrections. Use this checklist before any conversation with a contractor or designer.
| What to Measure | Why It Matters |
|---|---|
| Each wall length (floor to ceiling) | Sets cabinet run and height options |
| Window locations and rough opening sizes | Determines upper cabinet placement |
| Door locations and swing direction | Identifies clearance conflicts |
| Ceiling height | Confirms whether ceiling-height cabinets are feasible |
| Distance between opposing walls | Confirms aisle width for galley or U-shaped layouts |
| Existing appliance locations | Flags plumbing and electrical rough-in positions |
| Floor transition points | Guides continuous flooring decisions |
| Soffit dimensions (if present) | Affects upper cabinet depth and height |
Before your first design meeting, answer these questions:
Photograph every wall, including close-ups of the electrical panel location, existing plumbing stub-outs, and any soffits or bulkheads. Bring both the measurements and the photos to your consultation. A designer or contractor who can see the actual space — even in photos — will give you far more accurate guidance than one working from dimensions alone. For a deeper look at what goes into a well-planned small kitchen, our small kitchen design improvement tips article covers project examples and practical tweaks worth reviewing before your meeting.
Accessibility note: Universal design principles recommend an adequate aisle width for wheelchair access, lever-style door and drawer hardware, and counters at 34 inches (rather than the standard 36 inches) for seated use. If anyone in the household has mobility considerations now or may in the future, flag this at the start of the design process — it’s far less expensive to plan for it upfront than to retrofit later.
The most consistent advice from practicing interior designers comes down to sightlines, light, and material continuity — three things that cost less to address than a structural change but deliver a visible difference.
“Pulling upper cabinets off at least one wall gives the eye an uninterrupted path across the room. That single move can make a small kitchen feel significantly larger — not because you’ve added square footage, but because you’ve removed the visual barrier that was making it feel closed in. Pair that with a continuous ceiling plane and the room reads as a completely different space.”
— Designer Michelle Squire, as cited by Elle Decor
Designer Darlene Molnar makes a complementary point about lighting: hanging pendants in a tight kitchen add visual weight at eye level and interrupt the sightline. Her recommendation is wall-mounted sconces and under-cabinet lighting instead, which keeps the ceiling plane clear and directs light exactly where you need it — on the counter.
These two moves together (open upper wall, low-profile lighting) are the before-and-after combination that shows up most often in small-kitchen transformations. A kitchen that previously felt like a corridor becomes a room with depth and air, without a single change to the cabinet count or floor plan.
When you talk to a contractor about these ideas, the specific asks are:
A practical example: a galley kitchen with upper cabinets on both walls feels like a tunnel. Remove the uppers on one side, replace them with two or three open shelves, add under-cabinet LEDs on the remaining upper run, and use a glossy subway tile from counter to ceiling on the open side. The floor plan hasn’t changed. The kitchen feels twice as large.
The galley and L-shaped layouts deliver the best combination of efficiency and flexibility for most small kitchens, but the right choice always comes down to your room’s exact dimensions and how many people cook at once.
| Point | Details |
|---|---|
| Top layouts for small kitchens | Galley, L-shaped, one-wall, and compact U or peninsula cover nearly every small-kitchen footprint. |
| Decisive measurement threshold | A 42-inch aisle is the minimum for two-cook operation in a galley or U-shaped layout. |
| Best single space-saving move | Relocate small appliances off the counter to reclaim 3–4 linear feet of prep space. |
| Budget contingency rule | Add 10–20% above your quoted project cost to cover demo surprises and rough-in changes. |
| The Kitchen, Bathroom & Flooring Store | Offers turnkey small-kitchen remodeling in Jacksonville, from design and material selection through professional installation, under one roof. |
Small kitchens reward precision. When we work on a compact kitchen remodel, the first conversation is always about function: how the household actually uses the space, what’s frustrating about it now, and what a successful outcome looks like day to day. From there, we match the layout to the room’s real dimensions rather than fitting the room to a preferred style.
At The Kitchen, Bathroom & Flooring Store, we handle design, material selection, and installation as a single project — no coordinating between a designer, a cabinet supplier, and a separate installer. That matters most in small kitchens, where a miscommunication between trades can mean a cabinet run that’s two inches too long or an appliance that doesn’t clear the door swing. Before your consultation, bring your wall measurements, photos of the existing space, and your answers to the decision checklist above. That preparation makes the first meeting productive and keeps the project on schedule.
A small kitchen remodel has more moving parts than most homeowners expect: layout decisions, cabinet lead times, appliance coordination, tile selection, flooring transitions, and permit scheduling. Managing those separately adds weeks to a project and creates gaps where things fall through.

The Kitchen, Bathroom & Flooring Store is a full-service remodeling option for Jacksonville, Saint Johns, and Duval County homeowners who want design, materials, and installation handled by one team. We carry cabinets, countertops, tile and stone, and flooring in our showroom, so you can see and compare finishes in person rather than guessing from a screen. Our designers work with your actual measurements and photos to develop a layout that fits your room, your workflow, and your budget — with financing options available for qualified projects.
To get started, schedule a design consultation at our Jacksonville showroom or request a free estimate online. Bring your measurements, your photos, and your checklist, and we’ll take it from there.
These resources support the guidance in this article and give you reliable starting points for deeper reading before a remodel.
| Source | What It Covers | Why It’s Useful |
|---|---|---|
| Elle Decor: Small Kitchen Design Tips | Designer-sourced sightline and lighting advice | Practical quotes from working designers on visual space strategies |
| KitchenAid: Small Kitchen Layout Ideas | Layout type comparisons | Clear guidance on galley and L-shaped layouts for small footprints |
| House Beautiful: Small Kitchen Ideas | Finish and material strategies | Designer-vetted color, surface, and material choices for compact kitchens |
| Build Design Hub: Small Kitchen Remodel Planning | Work triangle and zone planning | Step-by-step planning framework with contingency budgeting guidance |
| Designing Idea: Tiny Kitchen Layouts | Numeric footprint examples | Specific aisle and dimension references for micro-galley and micro-U plans |
| Flashy Kitchen: Small Kitchen Layout Remodel | Peninsula vs. island decisions | Clearance requirements and layout trade-offs for compact footprints |
| Cozy Spruce: Small Kitchen Design Guide | Appliance sizing and integration | Beginner-friendly guide to right-sizing appliances and reducing visual clutter |
These are starting points. Every kitchen is different, and published guides can’t account for your specific wall locations, utility rough-ins, or local permit requirements. Bring your measurements and project photos when you consult a remodeler — it’s the fastest way to get advice that actually applies to your space.