
Demolition typically eats up 10% to 30% of a remodel’s total budget, and that share swings hard depending on one factor most homeowners never think about until they’ve already signed a contract: whether the tear-out reveals lead paint, asbestos, rot, or structural surprises hiding behind your walls. National interior demolition pricing runs $2 to $8 per square foot, with residential jobs usually landing between $2 and $5 per square foot before anything unexpected turns up.
Here’s the part almost nobody budgets for correctly: how you demolish a space also determines how the IRS treats those costs. Tear down an entire structure, and the demolition expense typically gets capitalized into the land value under Section 280B, meaning you can’t depreciate it. Remove select components while retaining most of the structure, and you may qualify for a partial disposition election that lets you deduct the removal cost outright. That single distinction can be worth thousands of dollars, and most remodel planners find out about it only after the dumpster is already gone.
A modest bathroom gut with selective demo might run several hundred to a few thousand dollars in demolition costs alone. A whole-kitchen teardown with some structural work can run into the low thousands before framing even starts. Three levers determine which end of that range you land on, and you control all three before a single hammer swings.
Pro Tip: Ask your contractor to separate the demo line item from the rest of your quote before you sign anything. If they can’t break it out, they haven’t priced it carefully, and neither have you.
Demolition scope, hazardous material discovery, and the capitalize-versus-deduct tax distinction together determine whether your remodel budget holds or breaks.
| Point | Details |
|---|---|
| Budget 10% to 30% for demo | Demolition commonly represents 10% to 30% of total remodel cost depending on scope and surprises. |
| Test before you tear out | Pre-demo hazardous testing costs $300–$600 and can prevent $5,000–$15,000 abatement surprises. |
| Build in real contingency | Plan for 10% to 30% extra on the demo line, more for older or untested homes. |
| Know your tax treatment | Full teardown capitalizes costs into land under Section 280B; partial disposition may allow a deduction instead. |
| Choose bundled project management | The Kitchen, Bathroom & Flooring Store prices demo as a coordinated line item, with testing and permits handled inside one project timeline. |
Demolition pricing follows a fairly predictable structure once you understand the variables. Contractors quote it either as a per-square-foot rate for larger, more uniform spaces or as a flat fee for smaller, contained jobs like a single bathroom.
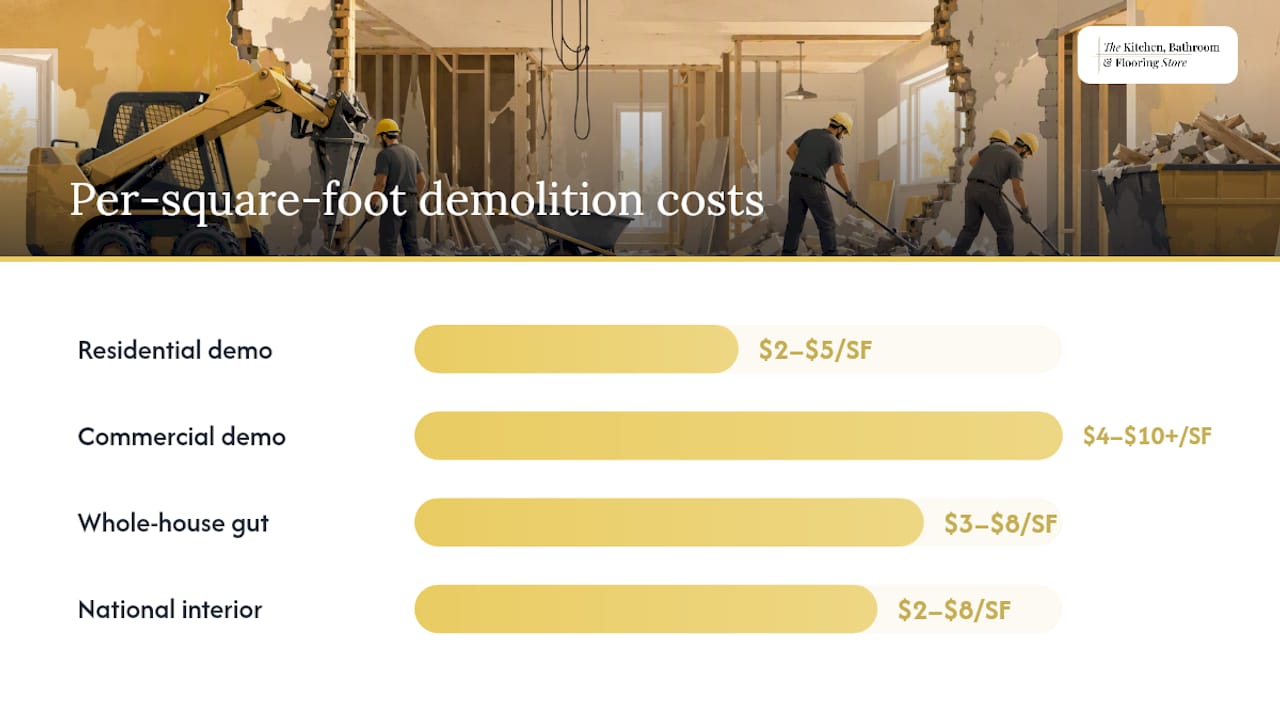
National interior demolition rates in 2026 commonly run from $2.00 to $8.00 per square foot. Residential projects generally sit at the lower end, between $2 and $5 per square foot, while commercial demolition often climbs to $4 to $10-plus per square foot due to code requirements, larger equipment needs, and stricter disposal rules. Flat fees tend to show up for small, self-contained jobs, a single bathroom gut, a kitchen soffit removal, where measuring square footage adds more overhead than it saves.
| Space or scope | Typical price range | Common pricing method |
|---|---|---|
| Interior demo (general, per SF) | $2–$8/SF | Per square foot |
| Residential interior demo | $2–$5/SF | Per square foot |
| Commercial interior demo | $4–$10+/SF | Per square foot |
| Bathroom (full gut) | $800–$2,500 | Flat fee |
| Kitchen (full gut) | thousands of dollars | Flat fee or per SF |
| Basement (finished space removal) | thousands of dollars | Flat fee or per SF |
| Whole-house interior gut | $3–$8/SF | Per square foot |
A few things jump out of that table. Bathrooms cost disproportionately more per square foot than any other room because of the density of fixtures, tile, and plumbing packed into a small footprint. Basements often surprise homeowners with higher-than-expected totals when finished walls, flooring, and old mechanical systems all need separate disposal streams.
The single most useful number to remember: $2 to $5 per square foot covers the vast majority of straightforward residential demolition. Anything quoted meaningfully below that range deserves a second look at what’s actually excluded.
Two contractors can walk the same 400-square-foot kitchen and come back with bids $3,000 apart, and both can be legitimate. The gap almost always traces back to a handful of variables that don’t show up in a simple square-footage number.
Labor is the biggest swing factor. Manual demolition, the kind required when you’re protecting adjacent finishes or working in a tight urban condo, costs more per hour than swinging a sledgehammer through an open, unoccupied space. Material density matters too: plaster-and-lath walls take substantially longer to remove than modern drywall, and older homes are full of them.

Debris weight and tipping fees quietly inflate bids that look identical on paper. A kitchen full of tile, cast-iron tubs, and concrete backer board weighs far more than one finished mostly in drywall and laminate, and landfill tipping fees are charged by weight, not square footage. Site access adds its own premium: a second-floor condo with no elevator, or a job requiring a dumpster to sit on a narrow street with a permit, both drive mobilization costs noticeably higher.
Utility capping, safely disconnecting electrical, plumbing, and gas lines before demo begins, adds licensed-trade costs that a general laborer can’t perform. And any job that requires structural work, removing a load-bearing wall, for instance, needs engineering sign-off before the sledgehammers even show up.
Selective demolition often costs more per unit than a total gut, which surprises a lot of homeowners. Removing a single wall of cabinets while protecting the surrounding flooring and finishes requires slower, more careful surgical work than clearing an entire room to the studs. Total gutting benefits from volume efficiency, crews can move fast when nothing needs protecting.
Pro Tip: If your remodel only touches part of a room, don’t assume selective demo will be cheaper than a full gut. Ask your contractor to price both scenarios so you’re comparing real numbers, not assumptions.
Before you request bids, put together a scope sheet so every contractor prices the same job:
Most interior demolition doesn’t require a standalone demo permit if it’s tied to a larger remodel permit, but structural removals, load-bearing walls, plumbing relocations, or full-gut jobs almost always do. Permit and inspection fees for residential remodels typically run a few hundred dollars depending on your municipality, and skipping this step can stall your project or void your homeowner’s insurance if something goes wrong.
The bigger cost risk by far is hazardous material discovery. Homes built before 1978 may contain lead paint, and homes built before the early 1980s may contain asbestos in flooring, insulation, or joint compound. When testing reveals either, work stops immediately until licensed abatement is completed, and abatement can add roughly $5 to $15-plus per square foot in affected areas alone.
The single most actionable number in this article: pre-demo hazardous material testing typically costs several hundred dollars. Skipping it and discovering asbestos mid-demo can add thousands of dollars or more to a project that was never budgeted for it.
Reduce your discovery risk with two simple steps taken before demo day:
Federal guidance under EPA and OSHA rules governs how licensed contractors must handle suspected lead and asbestos, and cutting corners here isn’t just a cost issue. Disturbing these materials without proper containment creates real health exposure for your family and anyone working in the home, and it can carry legal liability if discovered later during a resale inspection.
Selective demolition removes specific finishes or fixtures while preserving the surrounding structure and adjacent rooms. A full gut clears a space down to the studs and subfloor, removing everything.
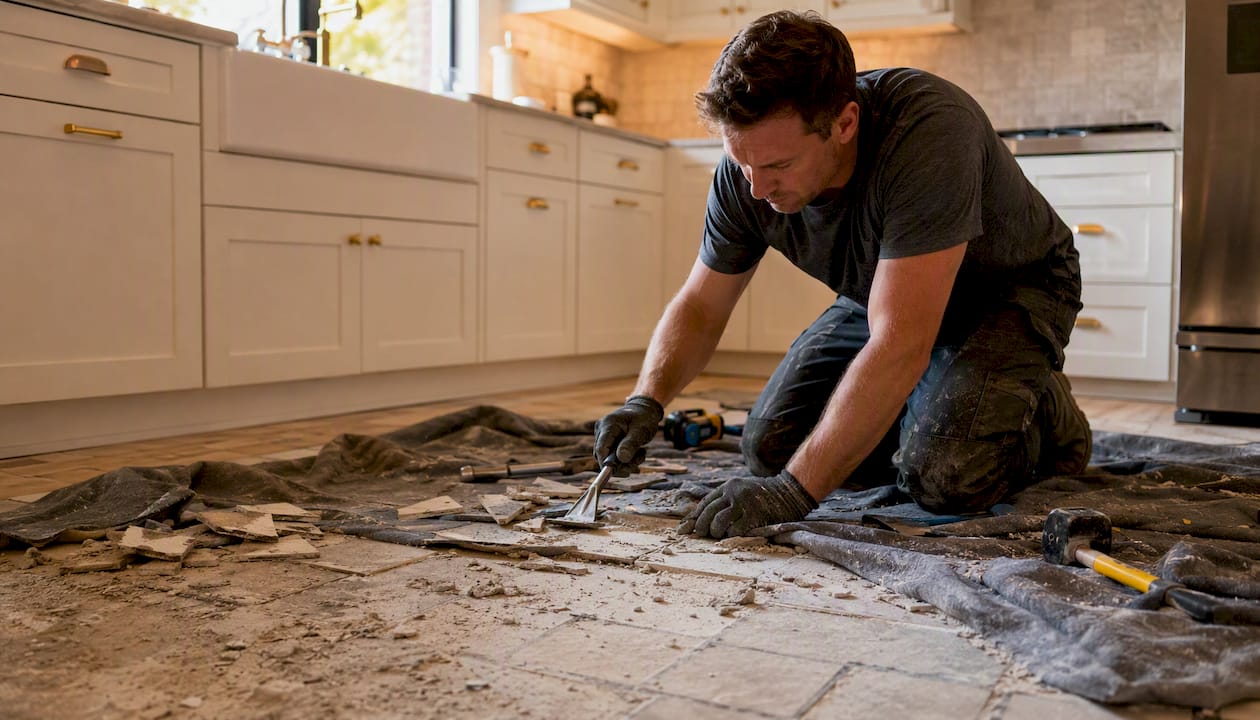
The cost tradeoff isn’t as simple as “gut is cheaper.” Selective work often runs higher per square foot because crews move slower to protect what stays, tarping floors, masking doorways, hand-removing tile without cracking the backer board beneath it. A full gut moves faster and generates a more predictable, uniform debris stream, which tends to lower the effective cost per square foot even though total tonnage may be similar.
Speed favors the gut approach too. A crew can often clear an entire kitchen to the studs in a day or two, while selective work preserving cabinetry, flooring, or trim can stretch to three or four days for the same footprint. That said, gutting carries more risk to anything you didn’t intend to touch, a shared wall, an adjacent room’s flooring, and rework from accidental damage adds cost fast.
Choose selective demolition when you’re preserving historical features, doing a partial remodel where only one wall or fixture group changes, or working in a home where matching existing finishes elsewhere would be expensive or impossible.
Choose a full gut when you’re changing the entire layout, replacing every surface anyway, or dealing with widespread damage, mold, water intrusion, outdated wiring that makes partial preservation pointless.
Pro Tip: If you’re on the fence, ask your contractor to price the job both ways. Sometimes the “cheaper-looking” selective approach costs more once you factor in the extra labor hours for protection and precision.
Pulling your own cabinets or ripping out old carpet can genuinely save money, and plenty of homeowners do it safely every year. The savings, though, come with real limits.
What DIY realistically saves you: labor costs on straightforward, non-structural work like removing cabinetry, flooring, or non-load-bearing partition walls in homes confirmed free of hazardous materials.
What DIY realistically risks: hitting a load-bearing wall without knowing it, disturbing lead paint or asbestos without containment, damaging plumbing or electrical lines behind a wall, and voiding your contractor’s warranty on the rest of the remodel because they now have to fix damage you caused.
Certain situations effectively require a licensed demolition contractor, whether your local code technically mandates it or not:
Before hiring anyone, run through this short vetting checklist:
Watch for red flags: a contractor who can’t produce insurance documentation, one who quotes a price without walking the site first, or one who brushes off your questions about hazardous testing. Comparing pro versus DIY installation tradeoffs on other home projects shows the same pattern: the labor savings are real, but so is the liability you’re taking on.
The reason two demo bids for the same room can differ by thousands of dollars usually isn’t dishonesty. It’s that one contractor priced a narrower scope than the other, and neither of you noticed until the work started.
A complete demolition quote should itemize, not bundle, these components:
When two bids come in far apart, ask each contractor to walk you through their unit pricing assumptions, how many labor hours they’ve budgeted, what debris volume they’re estimating, and whether hauling is included or billed separately. This is the fastest way to find out which bid is actually complete.
Red flags worth walking away from: a single lump-sum number with no line items, a quote with no listed exclusions, or a contractor who can’t tell you whether hazardous testing is included without checking with someone else first.
Pro Tip: Request written unit prices, dollars per square foot, dollars per cubic yard of debris, so you can quickly recalculate costs if your scope changes mid-project instead of waiting for a surprise change order.
Demolition sits on your remodel’s critical path, meaning delays here ripple through every trade scheduled after it. If demo runs a week over because of a hazardous material discovery, your framer, electrician, and plumber all shift back too, and some may have already committed to another job in the meantime.
Common causes of schedule creep during demo include unexpected structural damage found once walls open up, hazardous material discovery requiring a testing and abatement pause, and utility lines that don’t match the original building plans. Each of these converts directly into budget risk, because extended timelines mean extended equipment rental, extended dumpster fees, and sometimes extended temporary housing costs if you’ve vacated the home.
A sensible sequencing example for a kitchen remodel looks like this:
For contingency budgeting, plan on an extra 10% to 30% on the demolition line item specifically, with older homes and untested buildings pushing toward the higher end. Keeping your total renovation spend within the 30% rule, avoiding more than roughly 30% of your home’s value in renovation costs, helps you stay grounded even when demo surprises push individual line items higher.
Numbers land differently once you see them applied to an actual project. Here are two scenarios that show how demolition scope changes both the total cost and the share of your overall budget.
Scenario A: Modest bathroom remodel, selective demo. A 50-square-foot bathroom keeps its existing layout, only the tub, vanity, and flooring are removed, while plumbing rough-ins stay in place.
| Line item | Cost | Notes |
|---|---|---|
| Labor (selective removal) | $600 | Tile, vanity, tub removal |
| Debris hauling and tipping | a few hundred dollars | Single dumpster load |
| Permit | a few hundred dollars | Minor permit, no structural change |
| Pre-demo testing | a few hundred dollars | home built before 1985 |
| Total demo cost | several hundred dollars | Roughly 12% of a $11,000 project |
Scenario B: Whole-kitchen gut with partial structural removal. A 200-square-foot kitchen is gutted to the studs, and a non-load-bearing wall between the kitchen and dining room is removed to open the floor plan.
| Line item | Cost | Notes |
|---|---|---|
| Labor (full gut) | thousands of dollars | Cabinets, flooring, drywall to studs |
| Debris hauling and tipping | thousands of dollars | Heavier debris volume |
| Permit and inspection | $400 | Wall removal requires permit |
| Engineering review | $600 | Confirms wall is non-load-bearing |
| Pre-demo testing | several hundred dollars | home built before 1985 |
| Total demo cost | thousands of dollars | Roughly 17% of a $30,000 project |
Now add an unforeseen discovery. If Scenario B’s testing had come back positive for asbestos in the flooring mastic, abatement alone could add $5 to $15 per square foot across the affected area, potentially another $1,000 to $3,000 on top of the totals above. This is exactly why the 10% to 30% demo-line contingency isn’t optional padding. It’s the buffer that keeps a hazardous surprise from blowing up your entire project budget instead of just the demo line.
Here’s where remodel budgeting quietly turns into a tax planning decision, and it’s the piece most homeowners never see coming until their accountant asks about it.
Under IRC Section 280B, if you demolish an entire structure, the demolition costs generally get capitalized into the value of the land rather than treated as a current deduction. Since land isn’t depreciable, that money is effectively locked away from any tax benefit until the property is sold.
There’s a meaningful exception. IRC 1.168(i)-8 allows a partial disposition election when you remove specific building components, a roof, HVAC system, or interior finishes, while retaining the rest of the structure. Meeting this test can let you deduct the adjusted basis of the removed components along with the removal costs, instead of capitalizing everything.
Fall short of that, and the IRS is more likely to treat the project as a complete teardown subject to Section 280B capitalization.
If your records don’t allow an exact allocation of adjusted basis for the components you removed, accepted methods include a Producer Price Index rollback, a pro rata allocation of replacement cost, or a formal cost segregation study, all of which the IRS accepts when properly documented.
To protect a partial-disposition deduction, keep these records from day one:
Pro Tip: Talk to your accountant before demo day, not after. The partial-disposition election depends on documentation you can only capture while the work is happening, not after the dumpster’s already gone.
Tax professionals generally advise scoping a remodel to retain enough of the original structure to preserve partial-disposition eligibility whenever it’s feasible, since a full teardown can lock costs into non-depreciable land value with no way to reverse the decision afterward.
Most of the cost overruns described in this article trace back to one root problem: fragmented responsibility. A homeowner hires a demo crew separately from the remodel contractor, and when something goes wrong, hazardous material discovery, a miscommunicated scope, a permit nobody pulled, there’s no single party accountable for fixing it without a change order and a fight.
When demolition is priced as a line item inside a packaged remodel rather than a standalone job, that gap closes. One team is responsible for the pre-demo testing, the permit filing, the abatement coordination if needed, and the sequencing that keeps framing and installation trades from sitting idle waiting on a delayed teardown. That’s the practical value of full-service remodeling: it turns demolition from a separate liability into a coordinated step inside a single project timeline.
The safeguards that matter most are the boring ones: a line-itemized bid that separates demo costs from installation costs, hazardous testing scheduled before the sledgehammers show up, and a project manager who can shift the schedule the moment a surprise turns up behind a wall. Design assistance also plays a quiet role here, since a clearly defined design plan upfront reduces the odds of mid-demo scope changes that trigger expensive rework.
The Kitchen, Bathroom & Flooring Store prices demolition as a transparent line item inside your bathroom, kitchen, or flooring project, not as a mystery number a subcontractor adds later. That means the pre-demo testing, the permit handling, and the coordination with trusted abatement partners are already built into your plan before you sign anything, so you’re never staring at a surprise change order halfway through a gut job.

Every project starts with a free in-home estimate, where our team walks your space, identifies what needs to come out, and gives you a real number instead of a rough guess. If your remodel includes flooring removal and replacement, our flooring services fold that scope into the same project timeline instead of requiring a separate contractor. Ready to see what your demolition and remodel costs actually look like? Book your free in-home estimate and get a line-itemized plan before you spend a dollar.
What percentage of a remodel budget does demolition typically take up? Demolition commonly represents 10% to 30% of a remodel’s total cost, with the higher end reserved for jobs involving structural changes or hazardous material abatement.
Is demolition cheaper if I do it myself? It can save on labor for simple, non-structural removals, but DIY demo carries real risk around hidden utilities, load-bearing walls, and undetected hazardous materials that can turn a savings into a much larger repair bill.
Can I deduct demolition costs on my taxes? It depends on scope. Full-structure demolition generally gets capitalized into land value under Section 280B, while removing specific components while retaining most of the structure may qualify for a partial disposition deduction under IRC 1.168(i)-8.
How do I know if my home needs asbestos or lead testing before demo? Any home built before 1985 should be tested before demolition begins, since disturbing these materials without containment creates health risk and can halt your project until abatement is completed.
Why did two contractors quote such different prices for the same demo job? Bids usually differ because one contractor priced a narrower scope, excluding hauling, permits, or hazardous testing, than the other. Request itemized unit pricing from each to compare accurately.
This article is general information, not a substitute for advice from a qualified financial advisor. Consult a qualified financial professional about your own circumstances before acting on anything here.