
The best bathroom lighting plan layers three things: bright, shadow-free task light at the mirror, softer ambient light for the rest of the room, and a touch of accent light for style. Anchor the vanity with fixtures at the right height and CRI, choose ENERGY STAR LED bulbs, and confirm wet or damp ratings near tubs and showers. Get those three right, and everything else in the room falls into place.
TL;DR:
- Proper bathroom lighting balances three layers: bright task lights at the mirror, softer ambient lighting, and accent features for style.
- Fixtures near water must be wet-rated inside or directly above showers and tubs to meet safety codes and prevent hazards.
- Vanity lighting should be sized to about 75-80 percent of the mirror’s width, with sconces centered at 60-65 inches above the floor for optimal grooming.
- LED bulbs with CRI 90+ and a color temperature of 2500K to 3000K provide the most flattering and accurate skin tones for grooming tasks.
- Separating circuit and dimmer controls for task and ambient lighting enhance functionality and energy efficiency in the bathroom.
Not every idea on a design blog belongs in your bathroom. Some need ceiling height you don’t have; others need a wet rating your fixture doesn’t carry. Here are the ones worth real consideration, sorted by where they earn their keep.
Low ceilings and narrow walls rule out chandeliers and wide vanity bars fast. If your ceiling sits under 8 feet, stick to recessed cans and mirror-integrated lighting instead of anything that hangs down.
Pro Tip: Before you commit to any style, check whether the fixture’s finish is available in a wet-rated version. Some manufacturers only rate their least popular finishes for shower use, which can force a compromise you didn’t plan for.
Layered bathroom lighting means combining three distinct jobs, not just adding more fixtures.
Wire ambient and task lighting on separate switches, ideally with independent dimmers. Task lighting needs to stay bright enough for grooming, while ambient light can dim low for a 2 a.m. bathroom trip without blinding anyone.
A powder room can get away with just two layers: one ceiling fixture and one mirror light. A primary bathroom benefits from all three, especially when a shower or soaking tub is part of the room.
Pro Tip: Put your vanity lighting on its own dimmer separate from the ceiling fixture. Bright task light and a dim ambient glow can run at the same time without one washing out the other.
Vanity lighting fails more often from bad sizing than bad style. A fixture that’s too small looks like an afterthought; one that’s too big overwhelms a small mirror. The rules below come from lighting suppliers who deal with these mistakes daily.
Finalize your mirror size and sink centerlines before the electrician roughs in the boxes. That single step avoids the most common (and most expensive) mistake in bathroom lighting renovation, which is discovering the junction box sits in the wrong spot after tile goes up.
Choosing the right vanity size up front makes every one of these measurements easier to hit.
Bathroom lighting placement near water isn’t a style decision; it’s a safety one. Fixtures are rated for where they can legally and safely go.
Getting this wrong doesn’t just risk a failed inspection. It creates a real shock hazard in a room that’s already full of water and metal.
Skip generic bulbs and look for ENERGY STAR certification on the package. These LEDs use less power and are tested for consistent quality, though not every certified bulb is dimmable, so check the box before you buy a case of them.
Simple swaps, like a single sconce replacement, are reasonable DIY projects. Anything involving new circuits, wet-zone fixtures, or moved junction boxes belongs with a licensed electrician. For a full remodel, review how remodel phasing affects when lighting gets installed relative to tile and paint.
Pro Tip: Hand your electrician a printed list of mounting heights and fixture ratings before the job starts. Verbal instructions get lost between the estimate and the actual install day.
Bathroom fixtures take more abuse than lighting anywhere else in the house. Steam, humidity, and hairspray residue build up fast, and that buildup dims output long before a bulb actually burns out.
Wipe glass shades and mirror-light panels with a microfiber cloth and a mild glass cleaner every couple of weeks. Skip ammonia-based cleaners on anything with a metallic or brushed finish since they can dull the coating over time. For frosted or textured glass, a soft-bristle brush loosens dust in the grooves that a cloth alone won’t catch.
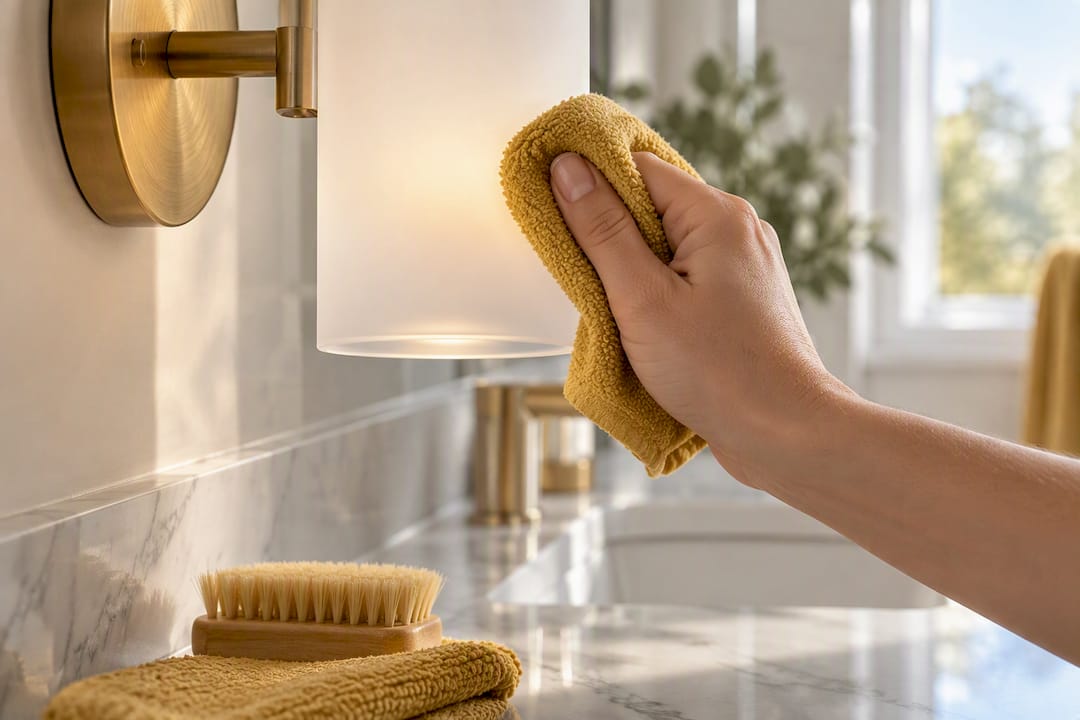
Check exhaust fan function regularly, since poor ventilation is what pushes moisture into fixture housings in the first place. A bathroom that vents well protects its lighting almost as much as its drywall.
When a bulb burns out, replace it with the same CRI and Kelvin rating as the rest of the fixture. Mixing a cool white bulb into a warm-toned vanity bar makes the whole wall look mismatched, even if only one bulb changed. Keep a spare of the exact model on hand. Discontinued bulbs are the number one reason homeowners end up replacing an entire fixture instead of a $12 bulb.
Inspect wet-rated fixtures in the shower zone once or twice a year for condensation inside the housing or a cracked lens. Either sign means the seal has failed, and the fixture needs replacing before it becomes a safety issue rather than just a cosmetic one.
Bathroom lighting runs on some of the shortest, most frequent cycles in the house. Lights flick on for a few minutes multiple times a day, which makes efficient bulbs and smart controls add up faster than in rooms used for longer stretches.
ENERGY STAR LED bulbs draw a fraction of the power older incandescent or halogen bulbs used, without sacrificing the brightness needed for grooming tasks. Because LEDs run cooler, they also hold up better in the humid, temperature-swinging environment of a bathroom than older bulb types did.
Dimmers cut energy use further by letting you run ambient light at partial output during late-night trips instead of full brightness every time. Motion sensors or timers on exhaust fan and light combo units prevent lights from running long after everyone’s left the room, a common energy leak in guest bathrooms that don’t get checked often.
Choosing fewer, better-placed fixtures also counts as an efficiency decision. A well-sized vanity bar and one ambient ceiling fixture, both on LEDs, often outperform a room stuffed with five decorative bulbs running on an old incandescent circuit. Efficient design and efficient bulbs work together, not separately.
Smart bulbs and switches bring real, practical benefits to a room people use half asleep or with wet hands. A voice-activated or app-controlled ambient light means no fumbling for a switch at 2 a.m., and preset scenes let you jump from bright grooming light to a dim relaxing glow with one tap instead of manually adjusting a dimmer.
Motion-sensor switches work well for guest bathrooms and kids’ bathrooms, where lights get left on constantly. Set one to auto-off after a set number of minutes and stop paying for a light nobody’s using.
Smart dimmers integrated with a home system let you schedule warmer, dimmer light in the evening and brighter, cooler light in the morning, which supports the kind of grooming-versus-relaxation split most bathrooms need. Some smart bulbs also adjust color temperature on a schedule, shifting from crisp white in the morning to warm amber at night, without you touching a switch.
Waterproof, voice-controlled smart speakers built into some fan or light combo units add music or news to a shower routine, though that’s a comfort feature more than a functional one. Stick to fixtures explicitly rated for bathroom humidity when adding any smart hardware near a shower or tub. Not every smart bulb or switch on the market carries a damp rating, and that detail matters more in a bathroom than anywhere else in the house.
Code compliance keeps you safe from shock hazards, but it doesn’t stop the everyday annoyances that make a bathroom uncomfortable to use. Two show up constantly: glare and moisture creep.
A bare bulb or a fixture with clear, unfrosted glass aimed straight at the mirror creates harsh glare that makes grooming harder, not easier. Frosted or diffused shades soften that output without sacrificing brightness, and they’re worth prioritizing over a bare-bulb look no matter how popular that style trends on design boards.
Overhead-only lighting causes a different problem: it throws shadows down across the face, under the brow and chin, which is exactly the opposite of what a shave or a skincare routine needs. That’s the core argument for side-mounted sconces over a single ceiling fixture; light from both sides cancels out the shadows a single source creates.
Moisture doesn’t stop at the shower curtain. Steam travels, and it settles inside light housings that aren’t sealed properly, even fixtures mounted well outside the immediate wet zone. Look for gasket seals on any fixture within a few feet of a shower, and don’t assume “close enough to damp-rated” is the same as actually rated for the location.
Ventilation ties directly into all of this. A bathroom fan that clears steam quickly protects both your fixtures and your air quality, and it’s worth pairing any lighting upgrade with a fan check rather than treating the two as separate projects.
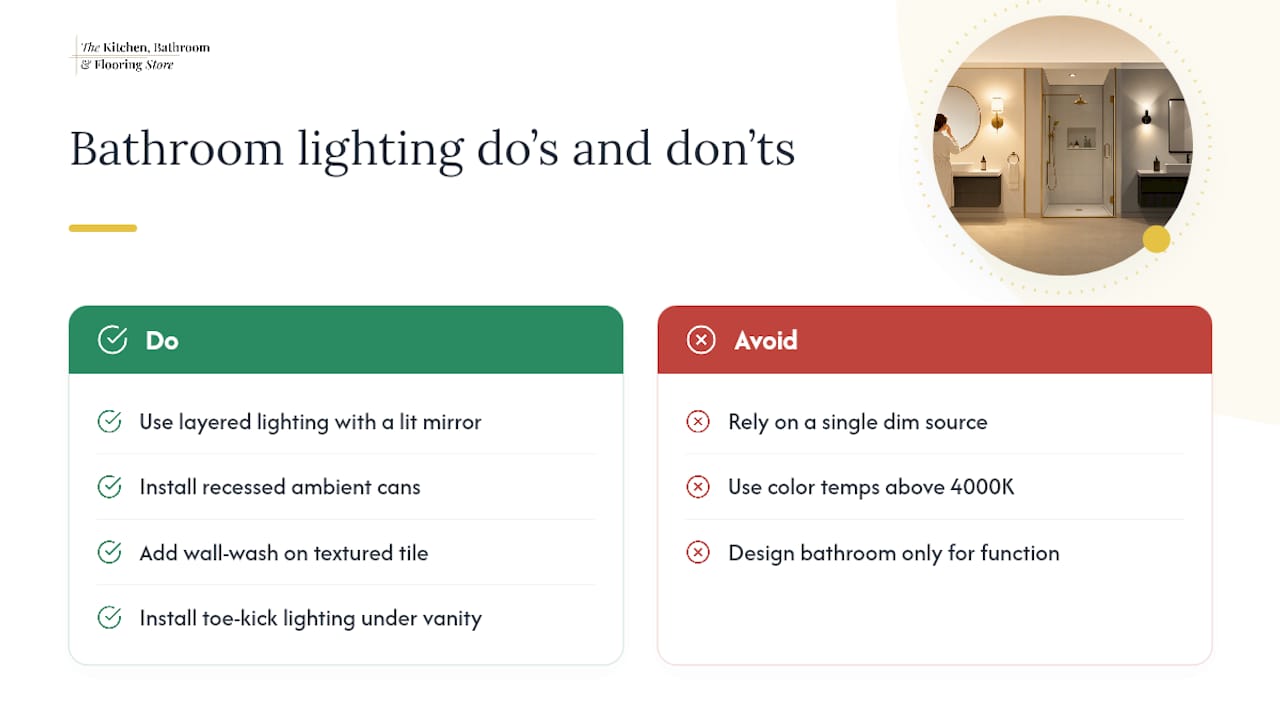
Lighting does more to a small bathroom’s sense of space than almost any other single change, including paint color. A dim, single-source room reads cramped and dated no matter how much you spend on tile. The same square footage under layered light with a lit mirror and soft accent glow reads open and current.
Recessed ambient cans spread light evenly across ceilings and walls, which removes the dark corners that make a room feel boxed in. Wall-wash lighting aimed at a textured tile wall adds visual depth, tricking the eye into perceiving more distance than the room actually has. Toe-kick lighting under a vanity cabinet does something similar at floor level, making the cabinet look like it floats rather than sits heavy on the floor.
Color temperature affects mood as much as it affects grooming accuracy. Warmer light in the 2700K to 3000K range reads as relaxing and residential, while anything above 4000K starts to feel closer to a clinical or commercial space. That distinction matters more in bathrooms than most rooms in the house, since bathrooms swing between functional tasks and unwinding moments in the same few square feet.
The wellness angle behind this shift isn’t just a design trend. A 2025 Houzz study found that a quarter of homeowners now use their primary bathroom specifically for relaxation, and nearly as many use it for beauty and pampering routines, with upgraded lighting leading the list of features driving that shift. A bathroom built only for function misses half of what people actually want from the room today.
Homeowners overspend on statement fixtures and underspend on placement, and that’s backwards. A gorgeous pendant hung at the wrong height, or a chandelier installed where code says it can’t go, creates more regret than a plain fixture mounted exactly where the math says it should sit. Get the measurements right first. Style second.
The industry also oversells smart features before nailing the basics. A voice-controlled dimmer means nothing if the underlying fixture throws shadows across your face every morning. Fix the layering and the sizing, then layer in the smart controls as a convenience, not a substitute for good design. We think the homeowners who end up happiest with their bathroom lighting renovation ideas are the ones who treated the vanity as the anchor of the whole plan and built everything else around it, rather than picking fixtures room by room on style alone.
— Anna
Reading through sizing rules, CRI charts, and wet-rating requirements is one thing. Coordinating a mirror, vanity, fixtures, and an electrician who all agree on the plan is another. Design, product selection, and installation handled under one roof helps avoid chasing down a fixture supplier, a tile installer, and an electrician separately and hoping their timelines line up.

Our Bathroom Remodeling Packages bundle personalized design help, a full selection of vanities, tile, and fixtures, and professional installation into one project, with in-house warranty coverage and financing options available. That’s a fit for homeowners who’d rather hand over the measurements, ratings, and finish decisions to a team rather than manage three separate contractors themselves. Visit a showroom or book a design consultation to walk through your layout and get a plan built around your specific mirror, vanity, and wet-zone requirements.
Layer ambient, task, and accent lighting, with task lighting at the vanity as the priority. Center that plan on proper mirror and sconce sizing and confirm every fixture near water carries the correct rating.
Sconces should sit around 60 to 65 inches above the finished floor, roughly at eye level. Above-mirror bars typically center between 72 and 80 inches AFF, lower in accessible bathrooms.
Aim for a CRI of 90 or higher paired with a color temperature between 2500K and 3000K for accurate, flattering skin-tone rendering. Cooler or lower-CRI bulbs tend to wash out or distort how skin and makeup look.
No. Fixtures inside the code measurement zone around a tub or shower must carry a wet rating, and certain fixture types like pendants and track lighting are prohibited there entirely regardless of rating.
Yes. The Bathroom Remodeling Packages include design assistance and product selection alongside installation, which covers fixture placement and rating decisions as part of the overall project.