
The most damaging kitchen layout design mistakes share one trait: they feel invisible on paper but create daily friction the moment you start cooking. Here are the top mistakes and a one-line fix for each, so you can spot problems before construction begins.
Getting the layout right, confirming appliance specs early, and following NKBA clearance minimums are the three decisions that prevent the majority of costly kitchen remodel mistakes.
| Point | Details |
|---|---|
| Confirm appliance specs first | Collect manufacturer rough-in sheets before cabinet fabrication begins to avoid expensive rework. |
| Use NKBA clearances as your minimum | Require 42"–48" work aisles, —/— sink landings, and a 26’ maximum work triangle on every plan. |
| Budget a 15–20% contingency | Reserve 15–20% of the total budget for unexpected structural, plumbing, or electrical issues. |
| Layer lighting and duct the hood | Combine ambient, task, and accent lighting; specify a ducted hood rated for your cooking load. |
| The Kitchen, Bathroom & Flooring Store | Provides end-to-end design, product selection, and installation coordination to prevent these mistakes from the start. |
A blocked or oversized island and a broken work triangle are the most common functional failures in kitchen design. The work triangle connects the sink, refrigerator, and cooking surface. According to NKBA’s Kitchen Planning Guidelines recommend the total of all three legs to stay within a practical distance range, with each leg sized to support comfortable movement. When an island sits inside that triangle, every cooking task turns into a detour.
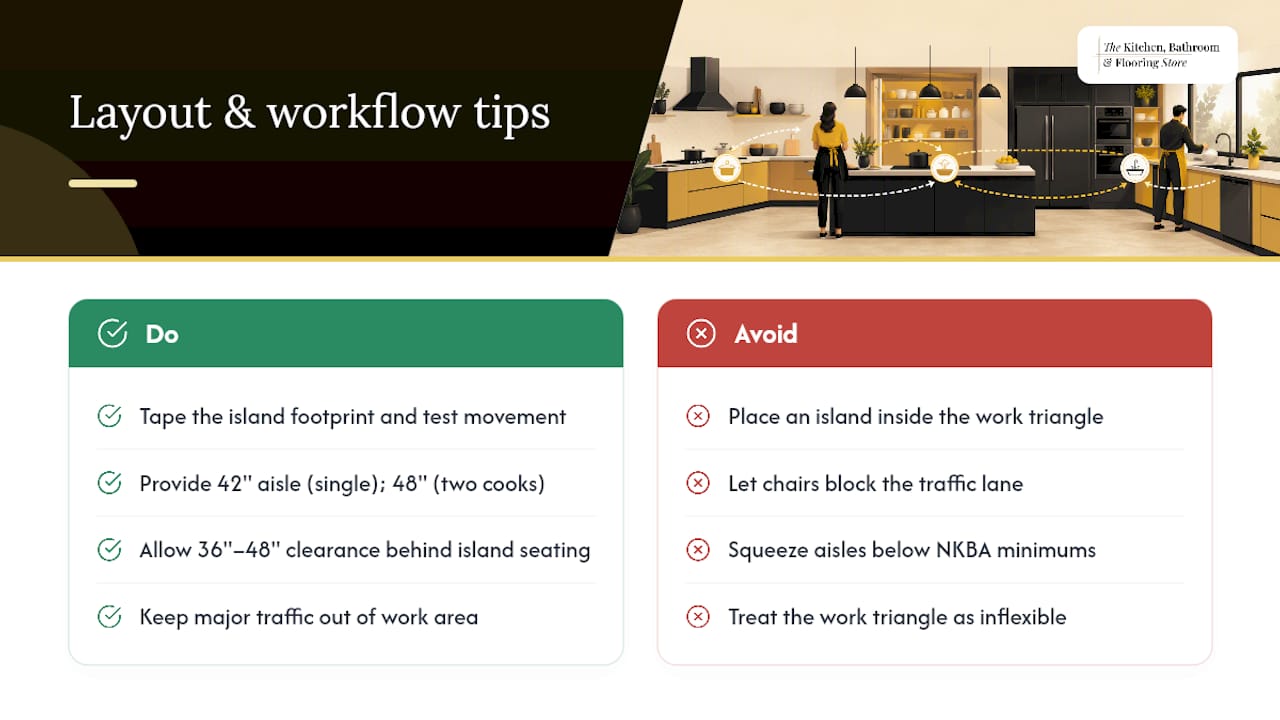
Aisle width is equally critical. NKBA recommends at least 42" for a single-cook kitchen and 48" when two people cook together. Designers also flag 36"–48" clearance behind island seating so chairs don’t block the traffic lane. A common mistake is treating the work triangle as a rigid rule rather than a starting framework. Modern multi-cook households often adapt it into work zones, but the core principle holds: no major traffic path should cut through the primary work area.
Pro Tip: Tape the island footprint on the floor with painter’s tape before ordering anything. Walk through a full meal prep, open every appliance door, and pull out every drawer. If you bump into the tape, the island is too large.
For a deeper look at how to test aisle widths and island siting before construction, the space planning guide for kitchens walks through practical measurement checks you can run yourself.
Storage and prep space decisions have the largest daily impact after layout. Homeowners consistently underestimate both, then spend years working around the shortfall.
A solid storage plan includes:
On the countertop side, plan a continuous prep area of at least 36" on one side of the sink. Smaller, fragmented counter sections force you to shuffle items constantly. Prioritize counter space adjacent to the range and refrigerator landing zone, since those two spots see the most action during meal prep.
Pro Tip: Assign a specific zone to each countertop appliance you use daily — coffee maker, toaster, stand mixer — and plan a cabinet door or appliance garage above each one. Everything else goes inside a cabinet.

The storage guide for kitchen remodels covers cabinetry options in detail, including pull-out configurations and pantry layouts worth considering before you finalize your plan.
Appliance specs must drive cabinetry dimensions and electrical work, not the other way around. Architectural Digest’s interviews with professional designers make this clear: ordering or confirming appliances after cabinetry is installed forces expensive custom adjustments that could have been avoided entirely.
Before cabinet fabrication begins, collect the manufacturer’s rough-in sheet for every appliance. That document lists:
On the electrical side, NKBA’s 2023 DC Guidelines specify receptacles spaced no more than 48" apart along countertops, at least one outlet on each side of the sink and cooking surface, and island outlet requirements for islands wider than 48". Dedicated 20A circuits are standard for the refrigerator, dishwasher, microwave, and garbage disposal. GFCI protection is required within 6’ of any water source, and AFCI protection is required in most jurisdictions for bedroom and living circuits — confirm local code with your electrician.
Pro Tip: Create a single appliance spec packet — one folder, physical or digital — containing every manufacturer’s rough-in sheet. Require your cabinet shop to sign off against those specs before cutting a single panel.
Layered lighting and a correctly sized ducted hood are non-negotiable for a functional kitchen. A single overhead fixture leaves the countertops in shadow every time you stand at them, which is the most common lighting complaint after a remodel.
A complete lighting plan includes:
Pendant fixtures over an island should hang 30"–36" above the countertop surface for standard 9’ ceilings. Under-cabinet strips work best when mounted 2"–3" from the front edge of the cabinet so the light hits the counter rather than the backsplash.
Ventilation is the more consequential mistake. Recirculating hoods filter grease but return moisture and odors to the kitchen. A ducted hood vented to the exterior removes both. Size the hood to cover the full cooking surface width, and add at least 3" on each side when possible.

Pro Tip: Match the hood’s CFM rating to your cooking style. A gas range with high-BTU burners needs a higher-capacity hood than an induction cooktop. Your hood manufacturer’s sizing guide will give you the minimum CFM for your burner output.
Choosing trend-first finishes often forces early replacements or functionality compromises. Polished marble countertops etch from citrus and stain from wine. Glossy large-format floor tiles show every footprint and become slippery when wet. Open shelving looks clean in photos but collects grease and requires constant maintenance.
Common finish mistakes and their practical alternatives:
A short note on indoor air quality: when selecting cabinets, adhesives, and flooring, look for low-VOC or CARB Phase 2-compliant products. Kitchens have limited ventilation when the hood is off, so off-gassing from new materials concentrates quickly in the space.
Pro Tip: Before committing to any finish, ask the supplier for a sample large enough to live with for a week. Test it with your actual lighting, your cleaning products, and a deliberate scratch or stain attempt.
Use NKBA’s Planning Guidelines as the minimum correctness checklist for clearance, landing areas, and electrical placement. These numbers are not aspirational — they represent the professional standard for safe, comfortable kitchen design.
For accessibility, a 60" clear floor circle allows a wheelchair to turn fully. Counter heights of 28"–34" accommodate seated users, and pull-out work surfaces can supplement a standard 36" counter height for households with mixed needs.
Pro Tip: Print the NKBA measurement table above and ask your designer or contractor to mark each dimension on the plan drawings before you sign off. Any number missing from the drawings is a gap worth resolving before construction starts.
Poor sequencing and late decisions cause most remodel cost overruns. The fix is a defined installation order that locks in decisions at the right stage, before the next trade begins work.
A practical sequence for most kitchen remodels:
On budget, Architectural Digest’s designer interviews recommend a contingency of 15–20% of the total project budget. Allocate that reserve toward unexpected structural issues, plumbing relocations, and electrical upgrades — the three categories that most often surface mid-project.
A realistic timeline for a full kitchen remodel runs 8–16 weeks from design sign-off to final installation, depending on cabinet lead times and permit processing. Use that range to vet contractor proposals: a quote promising completion in three weeks for a full gut renovation warrants close scrutiny.
For a step-by-step budgeting framework, the budget kitchen remodel checklist covers contingency allocation and sequencing in detail.
Run this checklist on every plan before you sign. A layout mistakes checklist is one of the most effective tools homeowners have to catch problems before construction locks them in.
Measurements to verify on the drawings:
Additional checklist items:
Pro Tip: Add one line to your contract: “Contractor will verify appliance rough-in dimensions against cabinet openings prior to cabinet installation and provide written confirmation.” That single sentence prevents the most common mid-project custom cabinet order.
The mistakes we fix most often on projects are not the dramatic ones. They’re the quiet decisions made early that compound into expensive corrections later.
The most frequent: appliance specs confirmed after cabinet fabrication has already started. A homeowner selects a range that’s 2" wider than the opening, and suddenly a custom filler panel or a full cabinet replacement is on the table. The fix costs more than the range itself. Requiring appliance specs before cabinet sign-off takes one conversation; skipping it can add weeks and thousands of dollars to a project.
Close behind that is clearance. Plans look spacious on a 2D drawing. A 36" aisle reads as generous until you open the dishwasher door and realize it blocks the refrigerator. We walk every plan through a door-swing and drawer-pull simulation before anything goes to fabrication.
Sequencing is the third pattern. Homeowners who manage multiple contractors independently often end up with flooring installed before cabinets, then damaged during cabinet delivery, or countertop templates pulled before cabinets are fully level. A single point of coordination prevents most of it.
Avoiding these mistakes on your own requires tracking dozens of interdependent decisions across design, product selection, and installation. The Kitchen, Bathroom & Flooring Store handles all of it under one roof, from the first measurement to the final appliance installation, with no need to coordinate separate contractors.

Our design team verifies NKBA clearances on every plan, collects appliance specs before cabinet fabrication begins, and manages the installation sequence so trades don’t step on each other. We carry cabinets, countertops, tile, and flooring options in our Jacksonville showroom, so finish selections happen alongside layout decisions rather than as an afterthought. Financing options are available to fit the project to your budget without cutting corners on the details that matter most.
Ready to get your kitchen plan reviewed by a team that catches these mistakes before they cost you? Request a consultation or visit our showroom to see materials and layouts in person.