
Yes, you can put a backsplash behind the range only, and it can look like a deliberate design choice. The cooking wall takes the most grease and heat, so protecting it first is practical. The difference between a feature and an afterthought comes down to three things: the panel is wider than the range, it stops at a logical line, and its edges are finished cleanly.
We install and supply kitchen tile and remodels across Jacksonville, St. Johns and Duval counties. Below is how we think about a partial backsplash, with sizes, ideas, materials and the safety checks that matter around a range.
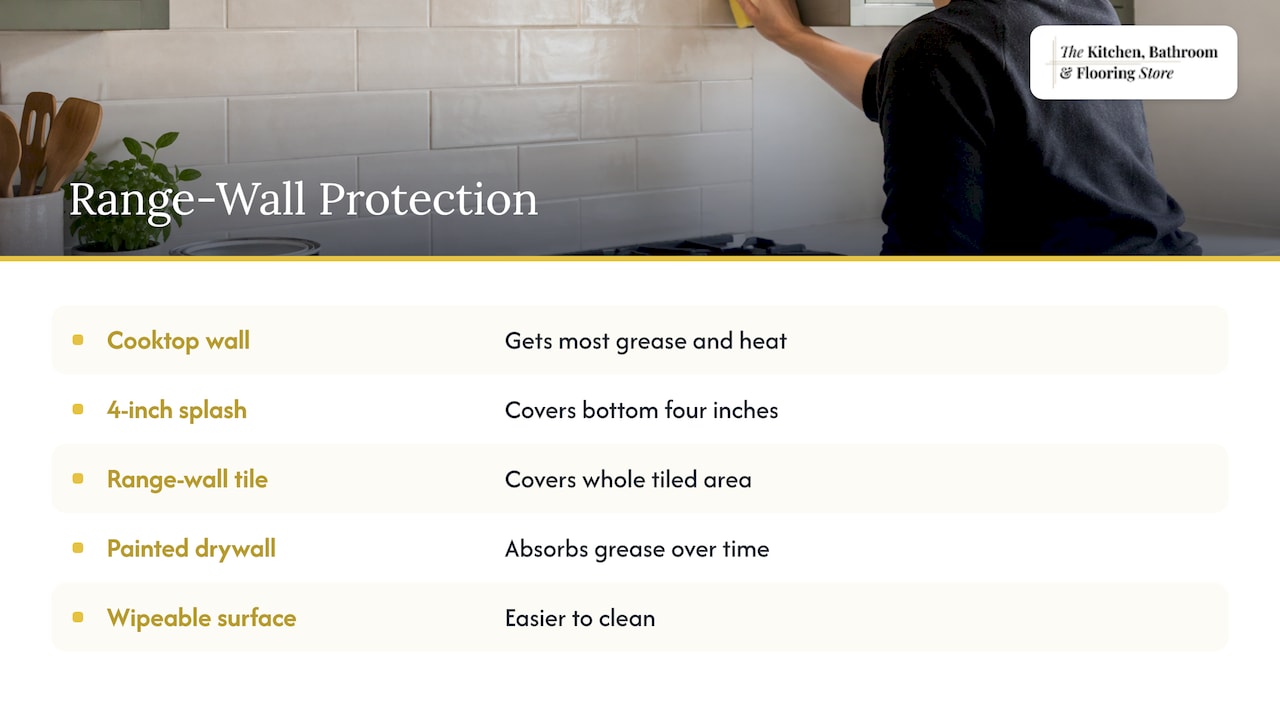
The wall behind the cooktop is the hardest-working wall in the kitchen. One Stonify comparison of countertop backsplashes points out that this wall gets the most grease and heat, and that a 4-inch countertop splash only covers the bottom four inches, while a full-height treatment on the range wall covers the whole tiled area.
A tiled range wall also makes cleanup easier. Fireclay Tile notes that a range-only tile backsplash shields the wall from cooking heat, grease, water, splatters and spills, and that it is easier to clean than ordinary wall finishes. Painted drywall absorbs grease over time. A wipeable surface does not.
That is the zoning idea: put the protection where cooking creates the most mess instead of treating every wall the same. Deslaurier frames it the same way, suggesting a backsplash behind the stove if you want to cut down on cleaning chores.
A range-only panel is a good fit in several common situations:
If you are planning a larger update, our guide to kitchen backsplash ideas that cut down on scrubbing grout covers full-wall options too.
The most common mistake is a panel that is exactly as wide as the range. It reads as a patch. A range-only backsplash looks intentional when it is meaningfully wider than the range, ideally spanning cabinet edge to cabinet edge, and rises to a purposeful stopping line such as the bottom of the hood or the ceiling, per DG Floors.
For a baseline, GetBacksplash says a range panel is typically as wide as the range or the hood, with the wider hood setting the width when the wall is open. The bottom normally meets the countertop line, and the top meets the underside of the hood, microwave or cabinet.
| Situation | Suggested width | Suggested top edge |
|---|---|---|
| Range between two cabinet runs | Cabinet edge to cabinet edge | Underside of hood or upper cabinet |
| Open wall with a wide hood | Match the hood width, or go slightly beyond | Underside of the hood |
| Range on open wall, no uppers | Wider than the range, tied to shelves or countertop ends | A shelf, ledge or the ceiling |
| Slab or quartz feature | Width of the range zone, aligned to cabinet lines | Ceiling for a dramatic look |
The goal is to line the panel up with something that already exists in the room: the hood, the cabinetry edges or an architectural line. That is what makes it a feature rather than a fragment.
Before you order anything, outline the panel with painter’s tape. StickWoll recommends checking heights from different viewpoints, such as the sink and the kitchen entrance, so the panel does not look undersized. The same source notes that a taller range zone can become a focal point, as long as it connects visually to nearby countertops, shelves or architectural lines so it does not look like an unrelated tower.
If you want a deeper walkthrough on measuring, see our backsplash height guide.
If your countertop has a short built-in splash, the range panel simply sits above it, or replaces it behind the range. Designer Carla Aston says a backsplash generally should stop at the upper cabinets, and a side splash is usually unnecessary unless a sink or range sits very close to the end of the counter. Decide this at layout stage so the countertop fabricator and the tile installer agree on heights.
A floor-to-hood or counter-to-ceiling panel behind the range turns the wall into a statement. It works especially well with a simple, slim hood or with open space above. Keep the width tied to the cabinets on each side.
Designer Jennifer Gilmer describes a trend of using a half or two-thirds stone backsplash behind the range topped with a 6-to-9-inch ledge. The ledge holds everyday items like olive oil and softens the look. Designer Isabella Patrick adds in the same piece that a partial backsplash feels intentional when it stops at a point set by the design, such as a shelf or architectural element, rather than where the material ran out.
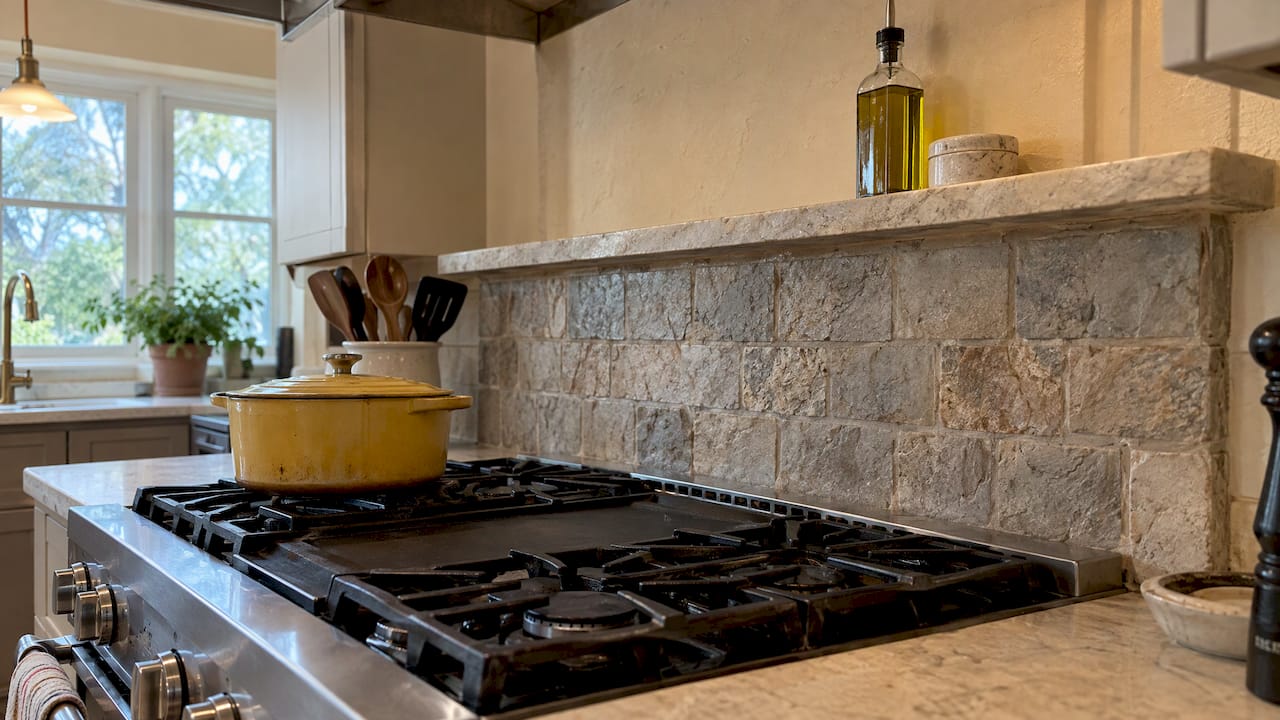
A wood or stone mantel around a tiled panel gives the range wall a fireplace feel. DG Floors lists mantel surrounds, chair rails and pencil liners among the more formal ways to finish a range-only panel.
If your cabinets and walls are neutral, a patterned or handmade-look tile behind the range adds personality without committing to the whole kitchen. Pick a color that picks up something already in the room. Our piece on the role of color in kitchen renovation helps you choose.
Fewer seams mean fewer lines to clean. A single slab or large-format porcelain panel behind the range gives a clean, modern look. Ask us about options through our kitchen countertops selection when you want the range wall to coordinate with your counters.
A panel looks most natural when the range sits in a clear place in the kitchen plan. If you are still deciding where the cooking zone goes, this practical guide to an efficient kitchen layout helps you see how the range, sink and prep space relate before you commit to a feature wall. Our own notes on space planning for kitchens cover the same ground from a remodeling angle.
A partial backsplash has exposed edges, so the finish matters more than on a full wall. DG Floors lists these options for a clean edge on a range-only tile panel:
Pick the edge before you pick the tile, because some tiles come with matching trim pieces and others do not. Your cabinets will thank you for a tidy transition where the panel meets the cabinet sides, too.
Behind a range, the best material is smooth, durable and has few places for grease to settle. In practice that means choosing glazed ceramic or porcelain tile, glass, or stone with a good sealer, and keeping grout lines narrow. Larger tiles and slabs have fewer grout joints to scrub.
Grout is where most cleaning trouble starts. Family Handyman recommends premium, stain-resistant grout for kitchen backsplashes, since standard grout is more prone to staining from cooking splatters. Ask your installer which grout product they plan to use before the job begins.
Glass tile deserves a note. This Old House explains that glass expands and contracts more than other materials, and that an anti-fracture membrane may be needed in areas prone to shifting or with glass tile to prevent cracking. A professional installer will plan for this up front.
You can browse backsplash options on our kitchen backsplash tile page and see samples in the showroom.
A range is a heat source, so check the appliance manual before you buy tile or trim. Requirements differ by model. For example, the manual for the Monogram 48-inch all-gas professional range calls for 12 inches of clearance from the rear of the range to a combustible vertical surface. A backsplash is required when there is less clearance, and the wall above the range and below the hood must be covered with non-combustible material. Your range will have its own numbers, so read your model’s installation instructions and confirm them with your installer or the manufacturer.
Once the product and layout are settled, the wall prep is simple but important:
In our showroom we see the same thing again and again: homeowners who tile only a small rectangle behind the range and then wonder why it looks like a patch. The fix is rarely a different tile. It is almost always a bigger, better-aligned panel.
We like to start with the cabinets and hood, not the tile. Where do the cabinet edges fall? Where does the hood end? Once those lines are set, the panel nearly designs itself. Our approach is to run it cabinet to cabinet, stop it at a clear line, and choose an edge finish that suits the style of the kitchen.
We also like a range-only backsplash as a budget tool. Putting your money into a good countertop and a focused, well-made panel behind the range can give you a kitchen that feels finished, and the wall that works hardest is the one that gets the protection. Because we handle design, product selection and installation under one roof, you do not need to coordinate separate tile, countertop and cabinet contractors to get the edges and heights right.
Anna
We are a one-stop showroom for kitchen, bathroom and flooring remodeling in the Jacksonville area. You can choose tile, countertops and cabinets, get design help and have the work installed by our team, so the backsplash, counters and cabinets are planned together. We offer financing options and an in-house warranty, and we aim for transparent pricing on every project.
If the backsplash is part of a bigger update, take a look at our kitchen remodeling packages, or stop by the showroom to see samples next to your countertop and cabinet choices. Working with a tight budget? Our budget kitchen remodel checklist walks through the order of operations.
Yes. The wall behind the cooktop gets the most grease and heat, so protecting it first makes sense. It looks best when the panel is wider than the range and stops at a clear line like the hood, a cabinet or a shelf.
At minimum, as wide as the range or the hood, whichever is wider. For a more intentional look, run it from cabinet edge to cabinet edge. Taping the layout on the wall first lets you check the proportions before you buy.
The common top line is the underside of the hood, microwave or upper cabinet. On open walls you can stop at a shelf or ledge, or take it to the ceiling for a feature look. Pick a line tied to the room’s architecture.
A smooth, glazed surface with few grout lines is easiest to wipe down, such as large-format tile or a slab. If you use tile, choose stain-resistant grout. Our team can show you samples in the showroom.
It depends on your range. Some manuals require non-combustible material above the range and below the hood, and specify clearances to combustible surfaces. Read your model’s installation instructions and have your installer confirm them before work starts.