
The best galley kitchen remodel ideas all share one goal: keep the walkway clear while packing in more storage than the footprint seems to allow. That means slim, one-side-deep cabinetry, drawers instead of doors, and layered lighting to counter the tunnel feel. The National Kitchen and Bath Association’s clearance guidance and 2026’s push toward “lived-in” finishes both point the same direction. Below, you’ll find the top ideas, the planning math, and a checklist to bring to your first showroom appointment.
TL;DR:
- Prioritize slim, one-side cabinetry and full-height pantries to maximize storage without compromising walkway space in a galley kitchen.
- Recessing or relocating the refrigerator away from the entrance prevents blocking traffic and maintains clear aisle widths.
- Layered lighting combined with reflective surfaces, such as glossy backsplashes and lengthwise flooring, visually widens the narrow space.
- Use drawer-based storage, multifunctional appliances, and compact units to free up counter space and improve workflow.
- Coordinating design and installation under one team reduces delays and measurement errors, ensuring a smoother remodel process.
Not every galley kitchen needs all ten of these moves, but ranking them helps you spend money where it actually changes how the room feels and functions.
Budget hint: items 1, 3, 6, and 7 are the best return for the money if you’re phasing the project. Items 9 and 10 usually require a contractor’s input before you commit, since they touch structure or plumbing lines.
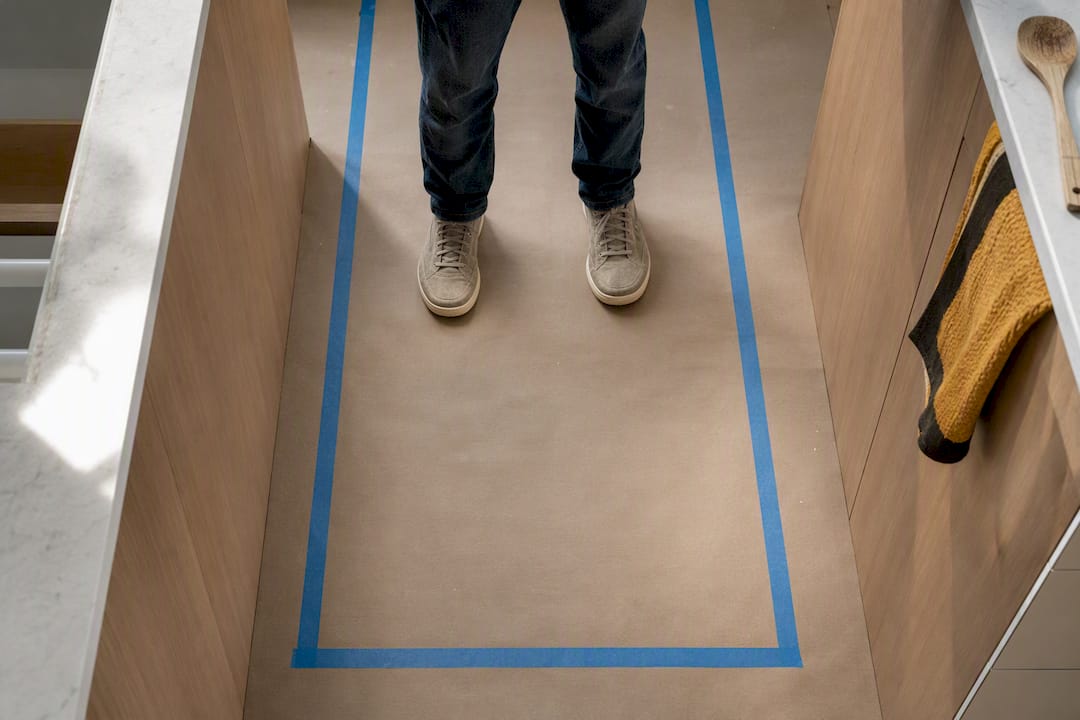
A galley kitchen lives or dies on its aisle. The National Kitchen and Bath Association recommends a minimum clearance of 36 inches between opposing counters, and 42 to 48 inches if two people cook at once. Anything tighter turns a simple dinner prep into a shuffle.
The most common workflow killer is a refrigerator planted right at the entrance. Every trip to grab milk or leftovers blocks whoever’s cooking, which is why designers recommend recessing the fridge or relocating it away from the doorway whenever the plumbing and electrical allow it.
Beyond clearance, think in zones instead of a straight run of cabinets:
A partial opening or peninsula helps when the wall isn’t load-bearing and there’s a room behind it worth connecting to. When the wall is structural, or the galley backs onto a stairwell or exterior wall, don’t force it. That’s when a smarter layout style inside the existing footprint beats a costly structural change.
Pro Tip: Tape off your proposed aisle width on the floor with painter’s tape before you sign off on cabinet drawings. Standing in that space for a day of real cooking tells you more than any floor plan will.
Drawers beat hinged doors in almost every galley kitchen scenario. A door forces you to crouch and dig; a drawer brings the whole contents to you, and it doesn’t swing into the walkway while you’re loading it. Efficient galley design leans on drawers over doors and full-height cabinetry for exactly that reason.
A few specific moves make the biggest difference:
The one-side-deep, one-side-shallow strategy is worth repeating here: run full 24-inch base cabinets on your primary wall, and keep the opposite wall to 12 to 15 inches for open shelving or slim pantry units. For a closer look at organizer types and layout math, our storage guide for kitchen remodels breaks down the options in more detail, and a partner like One Day Doors & Closets specializes in custom organization systems if you want that piece handled separately.
Pro Tip: Measure your current spice jars, sheet pans, and cutting boards before ordering drawer organizers. Off-the-shelf inserts rarely fit a narrow galley’s actual gear.
A single ceiling fixture is the number one reason galley kitchens feel like hallways. Layering three types of light fixes it: ambient overhead fixtures for general brightness, under-cabinet task lighting aimed at the counters, and accent lighting inside glass-front cabinets or above the range.
Reflective surfaces do the rest of the work. Design professionals consistently point to layered lighting, reflective surfaces, and pass-throughs as the three most effective tools for killing the corridor effect. A glossy or glass-tile backsplash bounces both natural and artificial light down the run.
Stark white reads clinical and can flatten a narrow room instead of opening it up. A light warm neutral or soft greige base does the same brightening job while adding depth. 2026’s “lived-in” trend favors over sterile all-white kitchens.
Consistency matters more than any single color choice. Keeping countertops, backsplash, and cabinet tones aligned prevents the visual breaks that make a narrow run feel chopped up instead of continuous.
Our guide to choosing a kitchen color scheme walks through specific pairings if you want a starting palette before your design consultation.
Panel-ready and integrated appliances read as cabinetry, not machinery, which is exactly what a narrow room needs visually. Paneling major appliances reduces the visual clutter that makes a small kitchen feel busier than it is.
Door swing is the practical half of the equation. A standard side-by-side fridge with wide doors can block the entire aisle when open. A 24-inch counter-depth model, a column fridge, or a French-door style with narrower panels intrudes far less into the walkway.
Most galley kitchen remodels run between roughly $16,200 and $65,000, with per-square-foot costs landing between about $75 and $250 depending on cabinet grade, countertop material, and how many appliances you’re replacing.
Cabinets and appliances typically eat the largest share of the budget, followed by labor, countertops, and any electrical or plumbing rerouting. Permits add a smaller but real line item, especially if you’re moving gas or water lines.
Timelines tend to follow a predictable rhythm: about four weeks for planning and design, then 6 to 10 weeks of construction depending on scope.
A few ways to trim the budget without gutting function:
When vetting a contractor’s proposal, check that the drawing shows clear aisle dimensions, appliance door swing arcs, and at least one landing zone near the fridge.
Two recent galley kitchen projects show how the same principles play out differently depending on the house.
One project involved a 1990s galley with the fridge blocking the doorway and dark oak cabinets on both walls. The fix: recessing a counter-depth fridge, switching to slim upper shelving on one side, and adding a glossy tile backsplash. The homeowner regained roughly four inches of aisle width and a noticeably brighter room.
A second project centered on a rental-adjacent starter home with almost no pantry storage. The solution was a full-height pantry column at the run’s end and drawer-heavy base cabinets throughout, paired with under-cabinet lighting.
Three takeaways worth bringing to a showroom consultation:
Coordinating design and installation under one team also means fewer scheduling gaps between the cabinet crew, the countertop template, and the flooring install.
Our space-planning guide for kitchens walks through the measuring step in more detail if you’ve never mapped a kitchen footprint before.
Pro Tip: Bring your three inspiration photos and your measured aisle width to your first design appointment. It cuts the back-and-forth on cabinet depth in half.
A galley kitchen puts everything within arm’s reach, which is either its biggest advantage or its biggest frustration depending on how it’s planned. Because both walls are close together, small ergonomic missteps get amplified fast.
Counter height matters more here than in an open kitchen, since you’re often working at close range to a second counter directly behind you. Standard counter height is 36 inches, but if the household includes someone notably taller or shorter, a stretch of counter at a different height near the prep zone solves a lot of back strain.
Reach zones deserve extra thought too. In a galley, it’s tempting to stack storage floor to ceiling on both sides, but anything above 72 inches becomes a step-stool problem for most people. Keep daily-use items in the 15 to 70-inch range and reserve the highest shelves for seasonal gear.
Turning radius is the other piece people underestimate. If two people cook together, the 42 to 48-inch clearance mentioned earlier isn’t just about walking room. It’s about being able to turn from the stove to the counter without bumping elbows. A single-cook household can get away with a tighter 36-inch aisle, but anyone sharing kitchen duty regularly should push for the wider clearance during planning, not after the cabinets are installed.

Cooking smoke and steam have nowhere to go in a tight galley without a real ventilation plan. A range hood pulling at least 100 CFM is the baseline for most home ranges, but a galley’s confined air volume means odors and grease residue build up faster than in an open kitchen.
Low-profile or downdraft ventilation systems solve the airflow problem without the visual bulk of a traditional box hood, which matters in a room where every inch of headroom affects how tall and open the space feels. A downdraft vent that rises from behind the cooktop and retracts when not in use keeps sightlines clear across the whole run.
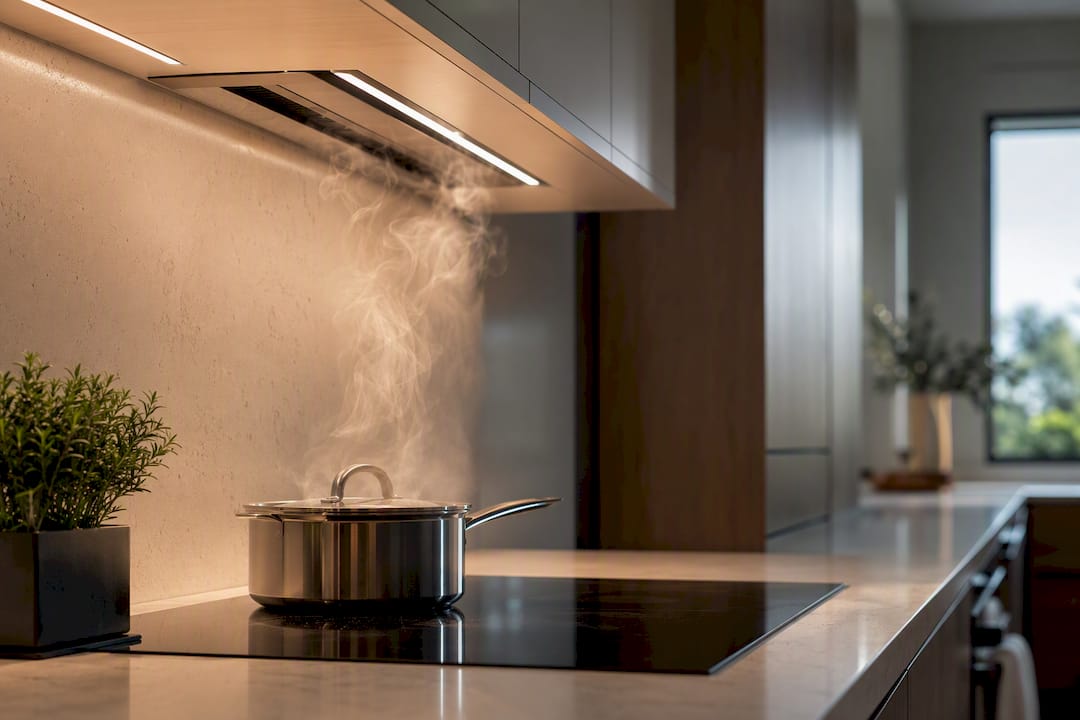
If the galley shares a wall with an exterior side of the house, ducting a hood straight out is usually simpler and cheaper than routing ductwork through interior walls or up through a second floor. That single detail can shift a ventilation upgrade from a weekend project to a multi-day one, so it’s worth confirming exterior wall access early in planning.
A secondary airflow fix many homeowners skip: a small exhaust fan or cracked window at the far end of the galley, opposite the cooking zone, creates cross ventilation that clears steam and cooking smells noticeably faster than a hood working alone.
Every appliance in a galley kitchen competes for counter and cabinet space, so appliances that do more than one job earn their spot twice over. A combination microwave and convection oven, installed as a drawer or wall unit, replaces two appliances’ worth of function in the footprint of one.
Slide-in ranges with a built-in griddle or grill zone cut down on the need for a separate countertop appliance that would otherwise crowd a landing zone. Similarly, a sink with an integrated cutting board or colander insert turns the cleanup zone into a secondary prep station without adding a single inch of counter.
Compact dishwashers, sized at 18 inches instead of the standard 24, fit into galleys where a full-size unit would eat too much of one wall’s storage run. They hold less per load, but for a one or two-person household, that trade-off usually beats losing a full cabinet’s worth of storage.
Induction cooktops are worth a mention here too. They run cooler than gas or standard electric, which matters when heat radiates across a narrow aisle toward the opposite counter where someone else might be working.
Galley remodels fail more often from coordination gaps than bad ideas. When cabinet, counter, and flooring crews work from separate schedules, small measurement mismatches turn into weeks of delay. A single team managing design through installation tends to catch those conflicts before they become change orders. Past galley projects handled this way have kept both timeline and design intent intact. If you’re planning a layout change, a showroom walkthrough is worth the hour before you finalize drawings.
— Anna
Coordinating a cabinet company, a countertop fabricator, and a flooring installer on your own is where most galley kitchen remodel plans lose momentum. Some remodeling companies handle design, product selection, and installation under one roof, so your aisle measurements, appliance panel specs, and flooring direction stay consistent from the first sketch to the final walkthrough.

Projects commonly covered include recessed fridge placements, drawer-first cabinet conversions, and full-height pantry additions in galley kitchens in a range of home types. Personalized design consultations with financing options built around budgets may be available, whether doing a full gut remodel or a phased upgrade. If a bathroom refresh is next on your list, our bathroom remodeling packages follow the same one-team approach. Ready to see layout options for your own galley? Visit our Jacksonville showroom to book a design consultation and get a real quote on your space.