
Yes, you can install LVP over existing ceramic or porcelain tile. It works best when the tile is solidly bonded, the surface is flat, the floor stays dry, and the grout lines are filled so they can’t show through the planks. Done that way, you skip a demolition job and still end up with a fresh, waterproof-style floor. Below we walk through what the tile has to meet, how to prep it, whether to float or glue the planks, and how to finish the edges and doorways.
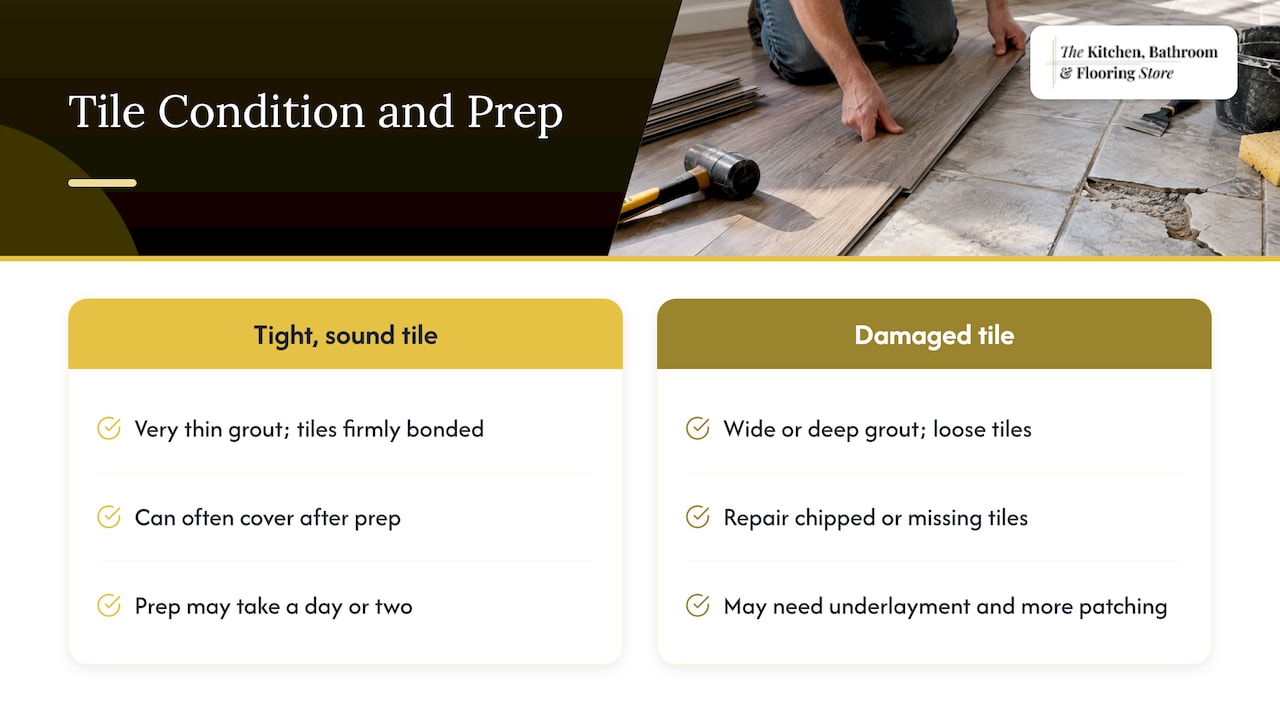
It is, with conditions. Home-improvement guidance from The Spruce says vinyl can go directly over ceramic and porcelain tile when the grout lines are very thin, and that cracked or missing tiles should be repaired or filled first. If the seams are wide or deep, it recommends an underlayment rather than installing straight onto the tile.
That tells you the real question is not “tile or no tile.” It is “what shape is the tile in?” A bathroom floor with tight grout joints and every tile firmly bonded is a very different starting point from a kitchen floor with chipped edges, loose tiles and deep, wide grout channels. The first can often be covered after a day or two of prep. The second needs more patching work, and our team can look at it with you before you commit to a plan.
The same logic applies to every wording of the question. Whether you are asking about LVP, vinyl plank, luxury vinyl tile, ceramic or porcelain, the planks are only as flat as the surface under them.
Manufacturers publish minimum requirements, and they are worth reading before you buy. Provenza’s MaxCore guidelines, for example, state that a floor under LVP must be structurally sound, smooth, clean, level and flat to 3/16 inch per 10 feet, and dry for the life of the installation. Those are one brand’s numbers, so check the guide for the product you choose, but they are a good picture of what “ready” looks like.
Here is what that means in your home.
Walk the room and tap the tile. A hollow sound or a tile that shifts means it has come loose from the thin-set beneath. Loose tiles should be removed and the voids filled so the surface is solid again. Cracked tiles should be repaired as well, since movement under the planks can show up as noise or uneven spots over time.
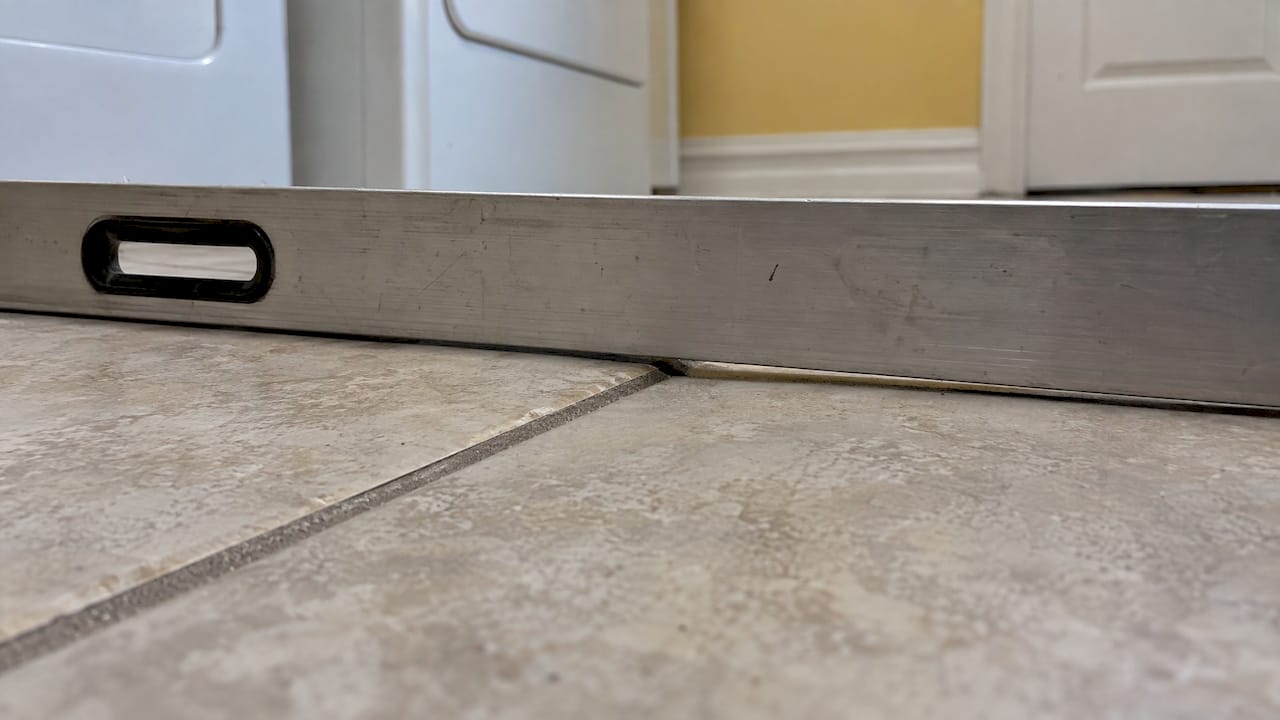
Lay a straightedge across the floor in several directions. Tile is usually flat, but it can have lippage, where one tile edge sits higher than its neighbor. Large-format tile in particular needs close attention to flatness, which we cover in our guide to large format tile flatness rules. Low spots can be filled with patching compound, and high spots can be ground down.
Soap scum, wax, grease and old sealer interfere with adhesive and can leave a film under click planks. Scrub, rinse and let the floor dry completely.
Moisture is the quiet cause of most flooring failures. The same Provenza guidelines require the floor to stay dry throughout the life of the installation. If the tile sits on a concrete slab, the tile does not change what the slab is doing underneath, so any moisture concern with the slab still applies. If you have had dampness, a leak or a past water problem in the room, deal with the source before any flooring goes down. Our guide to waterproof flooring by room helps you match products to the rooms most exposed to water.
The tile should be the only existing layer. Provenza also notes that certain existing floors, such as carpet, cushioned vinyl, other floating floors and parquet, have to come out first. LVP over a single layer of tile is acceptable under those guidelines. LVP over tile that is over another old floor is a different situation and needs a closer look.
Grout joints are recessed channels. Thin or soft planks can sag into them over time, and the pattern of the tile can show through the surface. This is often called telegraphing, and it is why prep matters more than the plank you pick.
The fix is straightforward:
If your tile has narrow grout lines and a smooth face, the prep is lighter. If it has wide joints, hand-scraped texture or a deep stone look, plan on a full skim coat. Plank thickness and wear layer also play a role in how forgiving the floor is, and our LVP thickness and wear layer guide explains how to read those specs when you shop.
Both methods can work over tile, and the plank you choose usually decides which one you use.
| Floating (click-lock) | Glue-down | |
|---|---|---|
| How it holds | Planks lock to each other and rest on the floor | Planks bond to the prepared surface with adhesive |
| Prep on tile | Fill grout lines, level, clean | Fill grout lines, roughen the tile, clean, then adhere |
| Perimeter | Needs an expansion gap around walls and fixed objects | Follow the adhesive and plank guide for movement joints |
| Good for | Faster installs, rooms with minor surface variation after prep | Areas where a fully bonded floor is preferred |
| Watch for | Gap covered by trim, not filled | Adhesive compatibility with the existing surface |
Floating planks are the most common choice for tile conversions because the prep is manageable and the install is fast. Remember the rules that come with a floating floor:
Glue-down installs bond the plank to the surface, so the tile must be properly prepared to accept adhesive. Daltile’s glue-down guide calls for 48 hours of acclimation between 65°F and 85°F before, during and after installation. Glue-down guides generally also have you roughen glazed tile so the adhesive grips. As with floating floors, grout joints get filled flush first.
Adding a layer raises the floor. That is normal, and you plan for it in advance.
If the floor is going into a bathroom, our team can also talk through the finished look with tile on the walls and shower surrounds. Our post on tile over tile in a bathroom covers the checks that apply when the new surface is another tile.
Homeowners choose this route for good reasons.
Three habits make the difference between a floor that looks good for a decade and one that shows problems in a year.
Follow the guide for your exact product. Plank manufacturers publish specific requirements for flatness, patching compounds, adhesives and expansion gaps. They vary, so the guide that comes with your plank is the final word.
Respect the grout patching time. Patching compound has to be fully dry before planks go down. Rushing this step is the most common reason pattern shows through.
Pick the right plank for the room. Thicker planks with a solid core and a good wear layer hide more minor surface variation and hold up better to traffic. In a bathroom or laundry, choose a product rated for those conditions. Our room-by-room waterproof flooring guide can help with that.
If a certain area of tile does not meet the requirements, there are simple ways to bring it up to standard: patching, grinding, a skim coat, or an underlayment suited to the product. A good installer will tell you which one applies after walking the floor.
Most of the tile-to-LVP calls we get start the same way: “I really don’t want to rip this up.” We understand. The good news is that for many homes, you don’t have to, as long as the prep is done properly.
What we see over and over is that the plank is rarely the problem. The surface is. A floor that is flat, dry and has its grout lines filled flush gives you a clean, long-lasting result. That is why we treat prep as part of the job, not an add-on.
Because we handle design, product selection, installation and project management ourselves, you don’t have to coordinate a tile person, a leveling person and a flooring person. One team walks the floor, helps you choose the right LVP for the room, and installs it. If you are updating a kitchen or bathroom at the same time, we can plan the flooring around your cabinets, vanity and shower so heights and transitions line up from the start.
Our advice: bring us photos or invite us over, tell us how you use the room, and let us show you what the finished floor can look like.
Anna
We offer flooring and installation from one showroom: you pick the product, work with our design help, and our team installs it, with no outside contractors to schedule. We also offer financing options through monthly payment plans, and our in-house warranty is part of how we stand behind the work.
If you are ready to turn tile into LVP, start with our flooring and installation page and tell us about your project. Serving homeowners in Jacksonville, Duval County and St. Johns County.
Planning more than the floor? Our kitchen remodeling packages and bathroom remodeling packages bring cabinets, counters, tile and flooring together under one plan. Not sure who should do the work? Our guide to hiring a residential flooring contractor lists what to ask.
Yes. Ceramic and porcelain tile make a suitable base when the tile is bonded, flat, clean and dry. The grout lines need to be filled flush with a cementitious patching compound, and any loose or cracked tiles repaired, before the planks go down.
Yes. Floating click planks are a popular choice over tile, provided the surface is prepped and flat. Leave the expansion gap the manufacturer specifies around walls and fixed objects, commonly 1/4 inch, and cover it with baseboard or quarter-round rather than grout or caulk.
In most cases, yes. Manufacturer guidelines call for filling grout lines with a cementitious leveling compound, and some require a full skim coat on textured tile. This keeps the planks from sagging into the joints and stops the tile pattern from showing through.
Yes, by the thickness of the planks and any underlayment or patching. Plan for door clearance, baseboard height, appliance openings and transitions to neighboring rooms. In bathrooms, the toilet flange may need adjusting.
It can be, if you choose a plank made for wet areas and the tile underneath is dry, sound and flat. Our team can help you pick the right product and plan the edges around the tub, vanity and toilet.