
The best shower niche design balances three decisions: orientation (horizontal vs. vertical), construction method (wet built-in vs. prefabricated), and waterproofing system. Get those right and everything else, tile, trim, lighting, is customization on top of a solid foundation.
Top niche types to consider:
Before you cut into drywall, measure your stud spacing and decide wet-built or prefabricated. Systems like MAPEI Mapeguard and Schluter KERDI both work, but they call for different framing approaches. The Kitchen, Bathroom & Flooring Store can walk you through either path during a design consult.
Getting a shower niche right depends on matching orientation and construction method to your stud bay, then waterproofing it properly before tile ever goes up.
| Point | Details |
|---|---|
| Match niche size to studs | Standard depth is about 3.5 inches to fit typical 2x4 wall framing. |
| Choose your construction method early | Decide wet-built vs. prefabricated (like Mapeguard or Schluter KERDI) before framing. |
| Slope the sill | A roughly 2-degree fall keeps water draining outward instead of pooling. |
| Use epoxy grout | Epoxy resists staining and water absorption better than cement grout in wet niches. |
| Work with a one-stop remodeler | The Kitchen, Bathroom & Flooring Store manages design, materials, and waterproofing together for shower niche installs. |
A shower niche is only as good as the layout it serves. Here are twelve design directions worth considering, each suited to a different shower footprint.
Not every idea fits every stud bay. Prefabricated niches come in fixed sizes, so confirm dimensions before you fall in love with a full-width design your framing can’t accommodate.
Standard niche depth runs about 3.5 inches, which matches the depth of a typical 2x4 stud wall without requiring you to build out the framing. Going deeper usually means furring out the wall, which adds cost and complexity.
| Niche Type | Typical Size | Common Use |
|---|---|---|
| Single shelf | 12" x 12" | Small showers, soap and shampoo |
| Double shelf | 12" x 28" | Two-tier storage for couples |
| Horizontal span | Up to 48" | Wide showers, statement feature |
Most installers set the bottom of the niche at a height comfortable for average adult use, typically around waist to chest level. Avoid placing a niche directly behind the showerhead, where constant water pressure stresses the waterproofing and grout lines.
Pro Tip: If you’re designing for aging-in-place or a family member with mobility needs, keep the niche within a 40-inch reach zone and avoid deep multi-shelf units that require bending.
Large-format tile inside a niche means fewer grout lines and less cleaning, but it also means more precise cuts around the opening. Mosaic tile is more forgiving to cut but adds grout lines that need extra attention in a constantly wet space.
Pro Tip: Professional installers recommend epoxy grout for shower niches because it resists staining and water absorption far better than standard cement-based grout, which matters most in a space that never fully dries.
If you’re using natural stone inside the niche, seal it at installation and plan to reseal every 12 to 18 months depending on water exposure. Coordinating your niche tile with the rest of the shower gets easier when you browse ideas on tile in modern bathrooms before you commit to a layout.
There are two ways to build a shower niche, and both require waterproofing no matter which you choose. Wet, or site-built, niches are framed from wood or metal studs, waterproofed with a membrane, then tiled directly. Dry, or prefabricated, niches are factory-formed foam units that install into the wall cavity ready to tile.
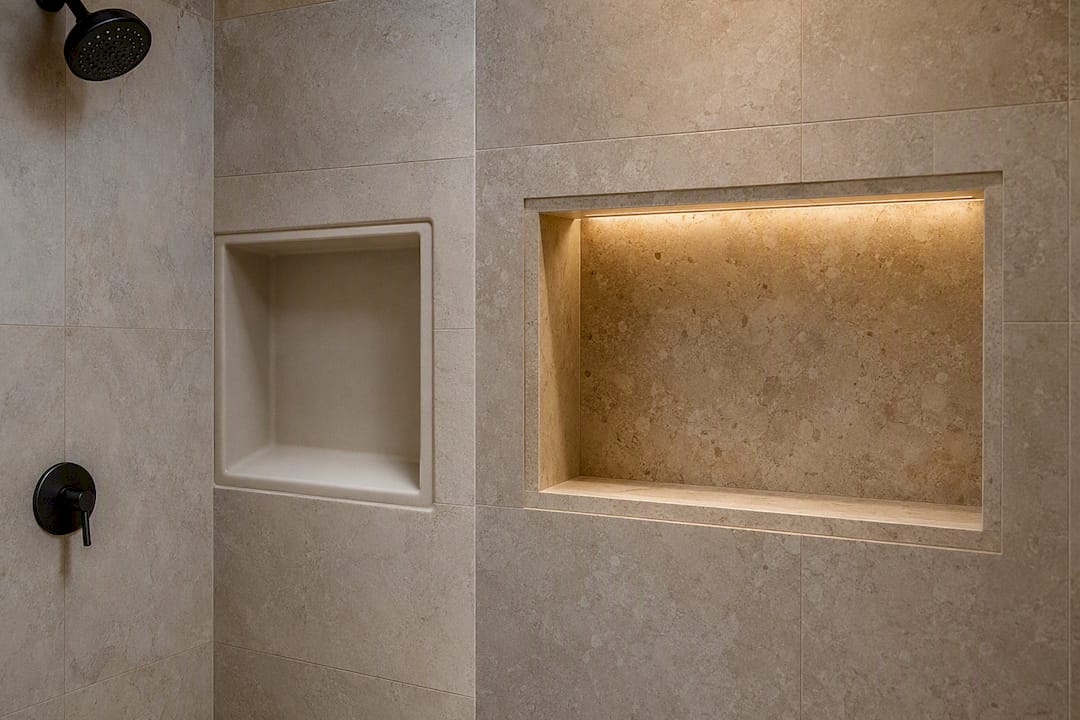
Wet-built niches offer more flexibility on size and shape but demand careful corner folding and membrane work, which is where most leaks originate. Prefabricated units, like MAPEI Mapeguard or Schluter KERDI board, arrive with formed corners and a pre-sloped sill, reducing the variables that cause failures.
A typical installation sequence looks like this:
For clean cuts around tight corners, tradespeople rely on tools like Rubi tile cutters to avoid chipped edges and wasted material. If corner waterproofing feels intimidating, that’s the moment to bring in a licensed pro rather than risk a redo.
The single most effective fix is a properly sloped sill, angled roughly 2 degrees or a 1/8 to 1/4 inch fall, so water drains outward instead of pooling against the waterproofing. Many pros lean toward prefabricated niches for exactly this reason: the slope and corners come factory-formed instead of hand-built.
Common mistakes to avoid:
Pro Tip: Ask your installer to confirm full membrane continuity and proper corner reinforcement before a single tile goes up. Once tile covers the wall, you can’t inspect what’s underneath.
Before signing off on a quote, confirm the exact niche dimensions, the construction method, and who supplies the waterproofing system. Comparing bids gets difficult if one contractor is pricing a prefab unit and another is quoting a custom wet-built niche.
Questions worth asking:
Cost drivers to expect: tile choice (large-format porcelain vs. natural stone), custom framing labor, integrated LED lighting, and whether you choose a prefabricated niche or a fully site-built one. A full breakdown of tile cost factors can help you budget before requesting quotes.
Verify the waterproofing yourself, and let membranes cure fully before tiling. Prefab niches tend to save time and cut down on call-backs.
Sourcing tile, trim, and a prefabricated niche from three different suppliers is how small projects turn into scheduling headaches. The Kitchen, Bathroom & Flooring Store handles design, material selection, and professional waterproofing and installation under one roof, so you’re not coordinating between a tile shop, a waterproofing sub, and a general contractor.

Whether you want a full-width illuminated niche or a simple single-shelf prefab, our design team can walk you through wet versus prefab options and help you avoid the waterproofing mistakes that cause callbacks. If your shower niche is part of a larger remodel, our Bathroom Remodeling Packages bundle design, materials, and installation into one straightforward plan. Request a consultation and bring your measurements. We’ll help you settle on orientation, construction method, and finish before a single tile is cut.
What is the standard size for a shower niche? Most niches run about 3.5 inches deep to match 2x4 stud framing, with common footprints of 12" x 12" for a single shelf and 12" x 28" for a double shelf.

How high should a shower niche be placed? Most installers position the niche at a height suitable for typical adult reach, though accessible or family bathrooms may have varied placements.
Is epoxy grout worth it for a shower niche? Yes. Epoxy grout resists staining and water absorption better than standard cement grout, which matters in a niche that’s rarely dry.
Should I choose a prefabricated niche or a custom wet-built one? Prefabricated niches offer factory-formed corners and a pre-sloped sill, which reduces leak risk for many renovations. Custom wet-built niches offer more flexibility on size and shape but require more precise waterproofing work.
Can I put a shower niche anywhere on the wall? No. Avoid placing a niche directly behind the showerhead, and always confirm plumbing and stud layout before cutting into the wall.