
The simplest route to a cohesive whole house flooring guide starts with one decision, not twenty: pick a dominant anchor material, limit yourself to three complementary materials total, and assign each room’s flooring by function and lifestyle rather than trend. That’s the approach Consumer Reports’ testing data and The Kitchen, Bathroom & Flooring Store’s project managers both point toward. Everything below builds on that single framework.
TL;DR:
- Selecting a single dominant anchor material for the main living areas creates a cohesive visual baseline for the entire house.
- Matching undertones across contrasting materials is more important than color consistency to achieve a unified look.
- Using the three-material rule—main, wet, and soft zones—limits complexity and maintains style throughout the home.
- Proper transition planning with level adjustments and matching grout lines prevents trip hazards and unplanned visual breaks.
- A full-service flooring provider reduces installation errors and simplifies coordination, especially in moisture-prone wet zones.
Most flooring disasters start the same way: someone falls in love with a tile in a showroom, then works backward, room by room, hoping it all matches up. It rarely does.
The better method starts with an anchor floor. That’s the material covering the most square footage in your home, usually your main living areas, hallways, and often bedrooms. Its tone, finish, and plank width set the visual baseline for everything else you’ll choose. A wide-plank, matte-finish white oak reads differently than a narrow, glossy walnut, and that difference ripples into every other material decision you make.
Before you touch a sample board, define your actual goals:
Once you know your anchor and your goals, sample in the actual rooms, not the showroom. Lay boards or tiles near windows and under your main light fixtures, and check sightlines from your kitchen into your living room, since that’s usually where transitions get noticed first.
Designers have a name for what keeps a multi-room home from looking like a flooring sample rack: the three-material rule. Pick one anchor material for main living spaces, one durable material for wet zones, and one soft material for bedrooms or cozy areas. Three materials, maximum, across the entire house.
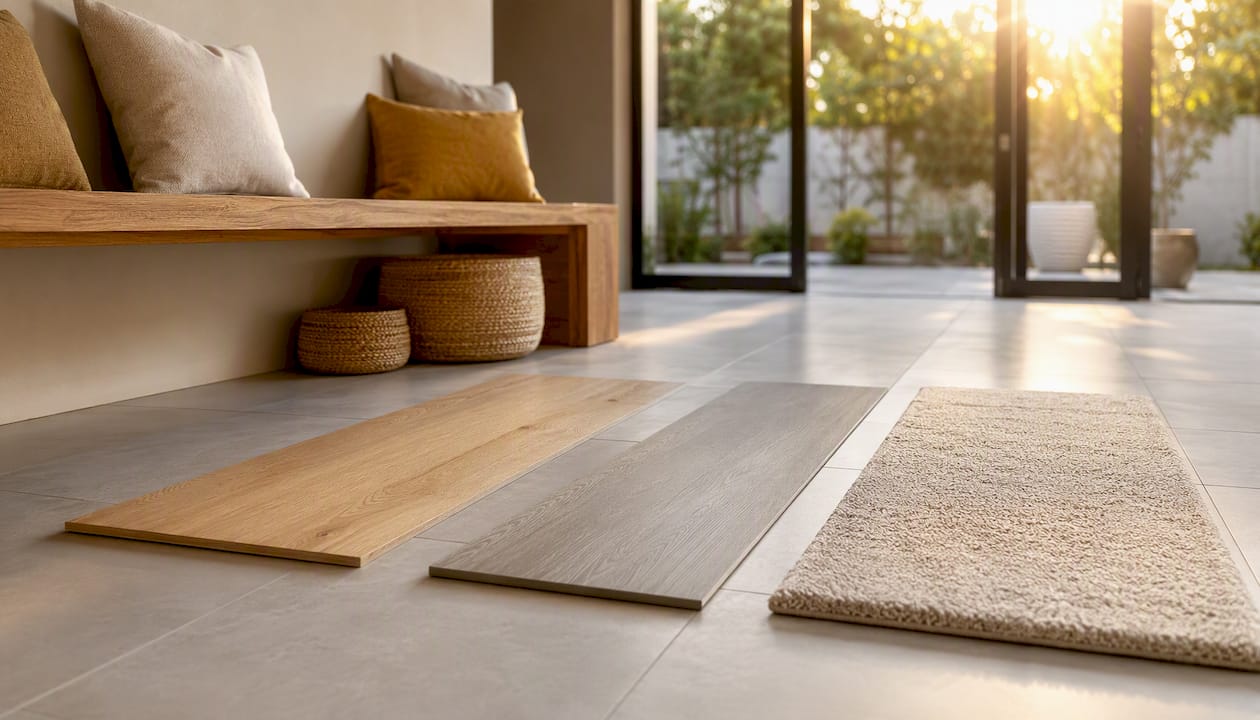
Each material has a job. Your anchor (often hardwood or engineered wood) carries the visual identity. Your durable material (tile, stone, or luxury vinyl plank) handles kitchens, baths, and mudrooms where water and grit are a daily reality. Your soft material (carpet, or an area rug over hard flooring) adds comfort where you want it.
The trick to making three different materials feel like one coherent home is matching undertones, not colors. A designer might pair a warm-toned oak with a beige-gray tile because they share the same undertone temperature, even though they look nothing alike stacked side by side. Undertone consistency matters more than matching wood species or exact tile shades.
Pro Tip: If a room feels visually cold or too large after flooring is installed, reach for a rug before you reach for a fourth material. It solves the same problem without breaking your palette.
You can break the rule, but only deliberately. A statement powder room floor or a mudroom pattern tile is fine as an accent, as long as it doesn’t touch your main sightlines.
Once your palette is set, the real decisions happen room by room. Here’s how to apply the three-material system without overthinking each space.
Living rooms and hallways. These carry your anchor material, and continuity here matters more than anywhere else in the house. Hallways especially benefit from running the same material through without breaks, since a hallway transition every ten feet reads as choppy. If your anchor is a lighter wood tone, a runner rug in high-traffic hallway zones extends its life without interrupting the visual line.
Kitchens and mudrooms. This is where waterproofing and slip resistance outrank appearance. Luxury vinyl plank has closed the performance gap with tile substantially, and it’s warmer underfoot and more forgiving if you drop a glass. Tile still wins on longevity and heat resistance near ovens, but grout maintenance is real work. If you go tile in a mudroom, choose a darker grout that won’t show salt stains and road grime the way white grout does.
Bathrooms and laundry rooms. Waterproof tile or a rated waterproof LVP are your only two serious options here. Substrate prep is non-negotiable. A comparison of LVP versus tile for humid, moisture-heavy climates is worth reading before you commit, since coastal humidity changes the calculus on both materials. Grout sealing needs to happen on a schedule, not just at installation.
Bedrooms. Comfort wins here over showroom appeal. Carpet still outperforms hard flooring for warmth and sound dampening in bedrooms, though engineered wood with a soft rug layered on top gives you resale flexibility if you’re not sure how long you’ll own the house. Future buyers tend to prefer hard flooring in bedrooms over wall-to-wall carpet, so weigh that against how long you plan to stay.
Entryways and transitions. Whatever sits just inside your front door takes the most abuse in the house: grit, water, dropped keys, dog nails. A durable material here, tile, stone, or a commercial-grade LVP, protects your anchor material from tracked-in debris before it ever reaches the living room.
The detail that separates a professional-looking whole-home floor from an amateur one is almost never the materials themselves. It’s the seams between them.
Different materials come in different thicknesses. Tile might sit a quarter inch higher than engineered wood once you account for mortar and backer board. That height difference has to go somewhere, and if your installer doesn’t plan for it, you end up with a trip hazard or an ugly reducer strip that draws the eye every time you walk over it.
Pro Tip: Walk every planned transition point in your house with painter’s tape before demo starts. It takes twenty minutes and catches height-mismatch and sightline problems while they’re still cheap to fix.
Every flooring material makes a durability claim on the showroom sign. The real answer is in the spec sheet, not the sign.
Hardwood brings resale value and warmth, but it’s sensitive to moisture and scratches from pet nails. Check the Janka hardness rating before buying. Oak and hickory hold up better in busy households than softer woods like pine.
Engineered wood handles humidity swings better than solid hardwood since its plywood core resists warping, and it works over radiant heat where solid wood often can’t.
Luxury vinyl plank (LVP/LVT) is fully waterproof and forgiving underfoot, and it’s become the default for mixed-use households. Check the wear layer thickness. For pet households, a 20-mil wear layer or a commercial-grade manufacturer warranty is the benchmark worth asking for.
Tile and stone are essentially immune to water and heat damage, but they’re hard and cold underfoot, and grout demands ongoing maintenance. Check the PEI rating for wear resistance and confirm slip-resistance ratings for wet areas.
Carpet wins on comfort and sound absorption but shows wear and stains faster than any hard surface, especially in high-traffic zones.
Laminate delivers the wood look at a lower price point than engineered hardwood, but check the AC rating for wear resistance. Most laminates can’t handle standing water, which rules out bathrooms.
Whole-house flooring costs vary enormously by material and layout complexity, and HomeAdvisor’s cost data is a solid starting point for per-room estimates before you get contractor quotes. Complex layouts, herringbone patterns, diagonal tile runs, or heavy subfloor repair, push costs well above a straightforward plank install.
Sequencing matters as much as budget. Contractors generally install dry zones (living rooms, bedrooms, hallways) before wet zones (kitchens, bathrooms), since it lets your household keep functioning in part of the house while work continues, and it reduces the risk of cross-contamination between demo dust and finished wet-area work.
Ask any flooring installer what callbacks look like three years after installation, and a pattern emerges fast.
High-gloss engineered wood in busy households is a frequent regret. It shows every scratch, scuff, and dog-nail mark within a year. Homeowner surveys point to a textured, matte finish as the better alternative since it hides wear instead of highlighting it.
Very dark floors are another common regret. They photograph beautifully but show dust and pet hair constantly. Medium tones with some grain variation hide daily debris far better.
Very light, low-variation floors have the opposite problem: every dropped crumb and muddy paw print stands out. A floor with some natural color variation camouflages daily life more forgivingly.
Coordinating an anchor material, two supporting materials, transitions, and installation sequencing across an entire house is a lot to manage with separate vendors. The Kitchen, Bathroom & Flooring Store handles design consultation, product selection, and installation under one roof, which means your undertone matching, transition planning, and scheduling all run through a single project manager instead of getting lost between a flooring showroom, a tile contractor, and an installer who’s never spoken to either.
For deeper reading on specific decisions, the child-friendly flooring options guide and the sun exposure and colorfastness guide both dig into material choices this article only touches on.
Whatever’s under your new flooring determines whether it lasts ten years or two. Skipping subfloor prep is one of the most expensive shortcuts a homeowner can take.
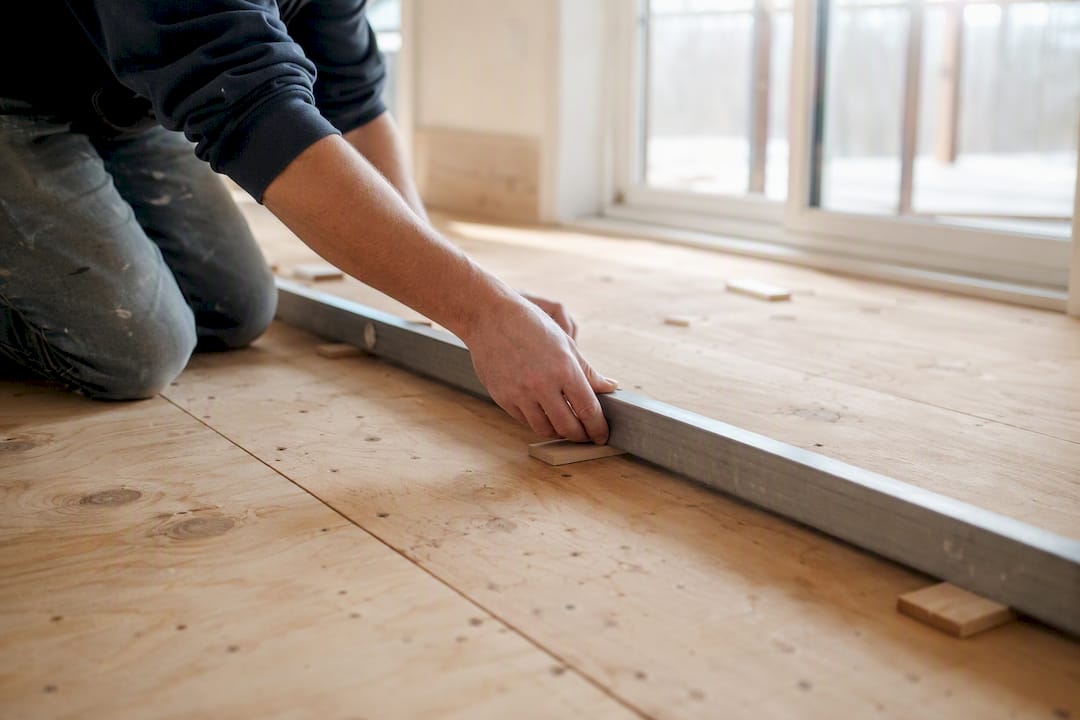
Start by checking your existing subfloor’s flatness. Industry tolerances are strict for a reason: an uneven subfloor causes tile to crack, LVP seams to peak, and hardwood to squeak within months of installation. Most installers use a straightedge and shims to identify low spots before laying anything new.
If your existing floor has moisture damage, especially in bathrooms, kitchens, or basements, that has to be addressed before new material goes down, not covered up. Water-damaged subflooring under a beautiful new tile floor is a problem that resurfaces, usually as a soft spot or a smell, within a year or two.
Removing old flooring reveals conditions you can’t always predict from above: old adhesive residue, uneven patching from a previous repair, or asbestos-containing materials in homes built before the 1980s (which requires a licensed abatement professional, not a DIY removal). Budget for a subfloor inspection as part of your project scope, not as a surprise change order midway through installation.
For radiant heat systems, subfloor prep gets more technical still. Not every material tolerates the temperature cycling, and your subfloor’s thermal mass affects how evenly heat distributes. This is a case where a professional assessment before ordering materials saves you from an expensive mismatch later.
Flooring warranties read like they promise everything and, in practice, cover far less. Reading the fine print before you buy saves a lot of frustration later.
Manufacturer warranties typically split into two categories: structural warranties (covering delamination, plank warping, manufacturing defects) and finish warranties (covering wear-through of the top protective layer). A 25-year finish warranty sounds reassuring, but most have exclusions for high-traffic commercial use, improper cleaning products, or installation over an unapproved subfloor, any of which can void coverage entirely.
Installation warranties are separate from manufacturer warranties, and they matter just as much. This covers workmanship: whether seams stay tight, whether transitions hold up, whether the subfloor prep was done correctly. A full-service installer who stands behind both the product and the labor closes a gap that trips up homeowners who buy materials from one source and hire installation from another.
Before signing anything, ask three questions: What voids this warranty? Is the warranty transferable if you sell the house? Does it cover labor to fix a defect, or only the material itself? A warranty that only replaces defective planks but doesn’t cover the labor to rip up and reinstall them is far less valuable than it sounds on paper.
The flooring trend of the moment will look dated in a decade. Your household’s actual traffic patterns, pet habits, and moisture zones won’t change nearly as fast, so prioritize lifestyle fit first and let appearance follow within that constraint, not the other way around.
Hire a professional for anything involving waterproofing, transitions between materials of different thickness, or radiant heat compatibility. Those are the three places where a DIY mistake becomes an expensive redo. Everything else, undertone matching, room sequencing, even material selection, you can reason through yourself with the framework above.
— Anna
Coordinating an anchor material, two supporting materials, transitions, and a phased installation schedule across an entire house usually means juggling a flooring showroom, a tile installer, and a general contractor who’ve never coordinated with each other. The Kitchen, Bathroom & Flooring Store removes that juggling act by handling design consultation, material selection, and professional installation under one roof, with financing options available if you’re phasing a whole-house project over your budget rather than all at once.

That matters most in wet zones, where waterproofing mistakes are the costliest to fix after the fact. If your plan includes a full bathroom overhaul as part of your whole-house flooring strategy, the bathroom remodeling packages bundle waterproof flooring, fixtures, and installation into a single scope of work. And if you’re using rugs as your soft-material layer per the three-material rule, custom area rugs let you dial in exactly the texture and tone your palette needs without committing to a fourth permanent material.
Ready to map out your whole-house flooring plan? Visit the showroom or schedule a consultation to walk through anchor material options, room-by-room recommendations, and a realistic budget together.