
Yes, you can remove a load-bearing wall, but only after a licensed engineer designs a replacement support system and temporary shoring is standing in place before any demolition starts. Three things are non-negotiable: a Professional Engineer’s stamped plans, proper temporary shoring, and a building permit with inspections. Budget for an electrician or plumber too, since utilities often run through these walls.
TL;DR:
- Removing a load-bearing wall requires a licensed engineer to design a support system, with stamped plans, proper shoring, and permits before demolition begins.
- Visual clues such as wall orientation to floor joists, stacked walls, and support columns can suggest load-bearing status but require engineering confirmation for safety.
- Temporary shoring must be carefully installed on both sides of the wall to safely support the load during removal, avoiding DIY substitutes that could cause structural failure.
- Costs typically range from low thousands for single-story projects to over $15,000 for complex or multi-story removals, with utility relocation and permits adding significant expenses.
- A site visit and engineering assessment beforehand prevent costly errors, and slow or poorly executed removals manifest as sagging ceilings, cracks, or stuck doors months later.
A few visual clues point toward a load-bearing wall, but none of them prove it on their own. Start here:
These indicators help you form a hypothesis, not a conclusion. Previous renovations, hidden beams, and unconventional framing choices can all throw off a visual read. Engineers trace the actual load path through the structure rather than relying on guesswork, and that’s the only way to know for certain. If you notice sagging floors, cracked drywall near a wall you’re considering removing, or a door that suddenly won’t close right, stop and call a structural engineer before you touch anything.
Removing a load-bearing wall in a kitchen or anywhere else in the house follows a predictable sequence, and skipping steps is where most expensive mistakes happen.
Trades involved typically include the PE, a structural contractor or framing crew, an electrician, a plumber if lines run through the wall, and the building inspector who signs off at key milestones.
Pro Tip: Schedule your inspection call as soon as shoring goes up, not after the beam is installed. Some jurisdictions want to see the shoring configuration before you proceed, and waiting can cost you a week of delays.
Temporary shoring isn’t a formality. It’s a custom-built support system, using adjustable jack posts, temporary stud walls, or engineered shores, positioned to carry the load path all the way down to the foundation while the permanent wall is out. Shoring goes up on both sides of the wall being removed, because a load path interrupted on just one side can shift weight unevenly and cause deflection.
Before crews start cutting into anything, a few safety steps matter:
Pro Tip: A single jack post propped under a beam is not the same as engineered shoring. DIY substitutes often concentrate load at one point instead of spreading it correctly, which is exactly how ceilings crack mid-project.
The wall itself comes down fast. What replaces it determines your cost, your ceiling height, and how much finish work follows.
Some spans work with a single beam running wall to wall. Longer or heavier loads need a beam plus one or two support posts, which changes your floor plan and may interrupt an open sightline you were hoping for. Either way, sizing and footing requirements come from the PE’s calculations, not a rule of thumb.
Cost depends heavily on span length, beam material, and what’s hiding inside the wall. Single-story wall removal commonly falls in the low thousands, while two-story or complex jobs can reach $9,000 to $15,000 or more, driven up by longer spans, steel beams, and utility work.
Hidden costs catch a lot of homeowners off guard:
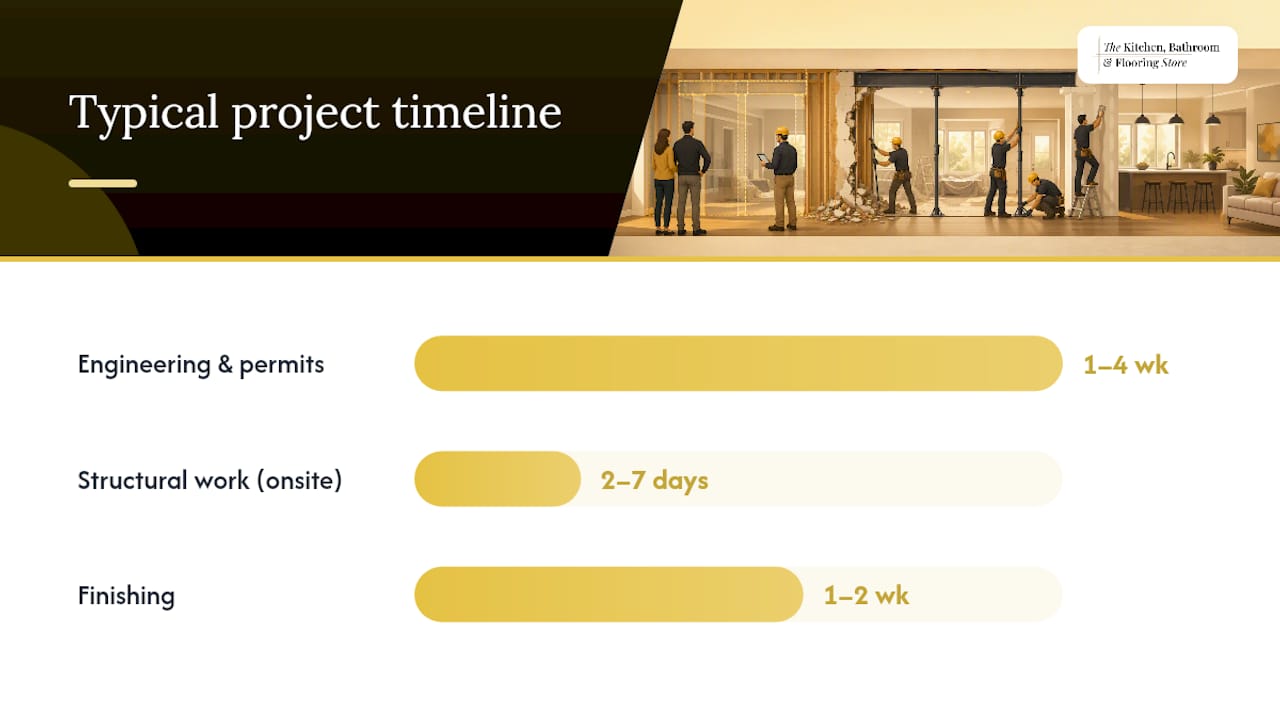
A realistic timeline runs one to four weeks for engineering and permitting, two to seven days of actual structural work on site, and one to two weeks for finishing, though local permit backlogs can stretch that first phase considerably. Get a demo cost breakdown before you finalize a budget, since demo work is frequently underestimated in homeowner planning.
Some parts of this project are reasonable for an experienced DIYer. Others simply aren’t.
Non-structural demo, debris cleanup, and prepping the space for trades are tasks a capable homeowner can often handle. Beam sizing, temporary shoring design, steel installation, and footing work are not DIY territory, full stop. That’s where the risk of a sagging floor or cracked foundation lives.
When vetting a PE or contractor, ask for:
Red flags include no PE stamp on the plans, a bid dramatically lower than everyone else’s, or any refusal to show proof of insurance. A single-contractor remodeling approach avoids a lot of this coordination headache by keeping engineering, permitting, and installation under one roof. For a look at how DIY missteps play out in adjacent renovation work, this breakdown of common door replacement pitfalls is worth a read before you commit to going it alone.
Opening up a kitchen or living space often means removing a load-bearing wall as step one of a bigger renovation. The Kitchen, Bathroom & Flooring Store provides personalized design assistance, project management, and professional installation, so you’re not juggling separate contractors for demo, framing, and finish work. Remodeling packages can be tailored around your budget from the start.
For related reading, check our guide on Florida’s remodel permit process and how design-build remodeling coordinates engineers and trades under one contract.
The wall itself is the easy part. What decides whether this project goes smoothly is whether you bring in a structural engineer before you start swinging a hammer, not after cracks show up in the drywall three months later. A short consultation upfront costs far less than fixing a sagging floor down the road. If I could give homeowners one piece of advice on this project, it’s to spend the money on the plans before you spend a dollar on demo.
— Anna
If coordinating a structural engineer, a framing crew, and a finish contractor sounds like more juggling than you want to take on, The Kitchen, Bathroom & Flooring Store handles the whole project under one roof, from initial design through final installation. A consultation includes a site visit, a review of your project scope, and a preliminary estimate so you know what you’re working with before committing to anything.

Financing options with monthly payment plans are available, and services cover homeowners in Jacksonville and surrounding counties. If your open-concept kitchen or bathroom remodel starts with a wall coming down, request a consultation on our bathroom remodeling packages page and get a real estimate instead of a guess.
Before you sign off on any structural plan, confirm the specifics with your own local building department. A few reliable references: HomeGuide’s cost breakdown for pricing factors, HomeAdvisor’s cost guide for regional ranges, and Home Depot’s permit overview for a plain-language walkthrough of the permit process.
It depends entirely on the engineer’s calculations for your specific span and roof or floor load. Some walls can open up almost entirely with a beam and posts, while others need a partial opening to stay within safe limits.
You can handle non-structural tasks like demo and cleanup, but sizing the beam, designing shoring, and installing structural supports require a licensed engineer and experienced contractor. DIY shoring mistakes are a common cause of costly structural damage.
Single-story removals commonly run in the low thousands, while two-story or complex projects can reach $9,000 to $15,000 or more, depending on span length, beam material, and utility relocation.
Yes, but older homes often carry extra considerations like asbestos testing, outdated wiring, and footings that weren’t designed for concentrated loads. An engineer’s site visit should flag these issues before demo begins.
Sagging ceilings, cracked drywall, and doors that suddenly stick are the most common symptoms, and they can take months to appear after a poorly engineered removal. Catching these early and calling a structural engineer prevents small problems from becoming expensive ones.